Amish White Bread Recipe – Soft & Easy Homemade Loaf
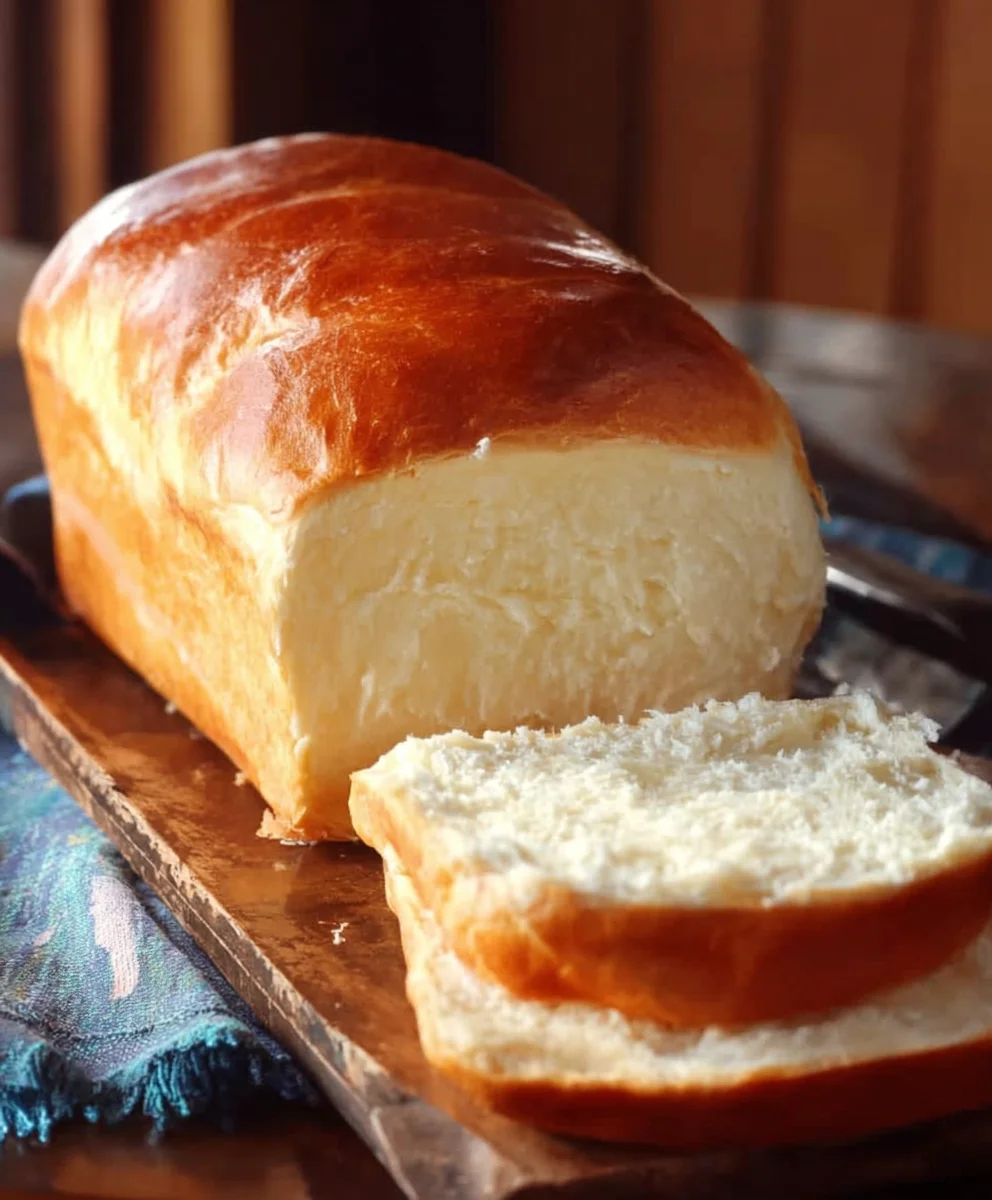
Amish White Bread Recipe is more than just a baked good; it’s a comforting embrace from simpler times, a fragrant promise of deliciousness filling your kitchen. Have you ever caught a whiff of freshly baked white bread and felt an instant sense of nostalgia, a longin extractg for wholesome goodness? That’s precisely the magic this classic Amish White Bread Recipe delivers. People adore it for its impossibly soft, cloud-like texture and its subtle, sweet aroma that hints at pure, unadulterated flavor. What truly makes this recipe special is its incredible simplicity, relying on just a handful of basic ingredients to create something truly extraordinary. It’s the kind of bread that forms the perfect canvas for butter, jam, or even just enjoyed on its own, a testament to the beauty of straightforward, honest cooking that has been passed down through generations. Get ready to experience the soul-warming delight of this heirloom Amish White Bread Recipe!
Ingredients:
- 1 cup warm water (about 110F)
- 1 pinch powdered gin extractger (optional, but a great way to wake up your yeast)
- 1 cup warm milk (about 110F)
- 2/3 cup granulated sugar (feel free to reduce this slightly if you prefer a less sweet bread)
- 1 1/2 tablespoons active dry yeast
- 1 1/2 teaspoons salt
- 1/4 cup vegetable oil (or, for a richer flavor, use melted coconut oil that has cooled to about 100F, or 1/4 cup melted butter)
- 5-1/2 cups bread flour (have a little extra on hand, as flour absorption can vary)
- 2 tablespoons unsalted butter, melted (for brushing the top)
Preparing the Dough
Step 1: Activating the Yeastgin extract4>
Begin by preparing your yeast mixture. In a large mixing bowl, combine the 1 cup of warm water with the 1 pigin extract of powdered ginger, igin extractou are using it. The ginger acts as a little boost to help the yeast get active and bubbly. Sprinkle the 1 1/2 tablespoons of active dry yeast over the top of the water. Let this mixture sit undisturbed for about 5 to 10 minutes. You’re looking for a foamy, bubbly layer to form on the surface. This foam indicates that your yeast is alive and ready to work its magic, leavening your bread. If you don’t see any foam, your yeast might be old, or the water might not have been the right temperature. In that case, you’ll want to start again with fresh yeast.
Step 2: Incorporating Wet Ingredients and Sugar
Once your yeast is frothy and active, it’s time to add the other wet ingredients and the sugar. Gently stir in the 1 cup of warm milk and the 2/3 cup of granulated sugar into the yeast mixture. Make sure the milk is also around 110F to avoid killing the yeast. Stir until the sugar is mostly dissolved. Then, add the 1/4 cup of vegetable oil (or your chosen alternative, like melted coconut oil or butter, ensuring it’s not too hot). Stir everything together until it’s well combined. This forms the liquid base for our delicious Amish white bread.
Step 3: Adding Salt and Flour
Now, we’ll start building the dough. Add the 1 1/2 teaspoons of salt to the wet ingredients. Salt not only adds flavor but also helps to control the yeast activity and strengthen the gluten structure gin extractthe bread. Next, gradually begin adding the 5-1/2 cups of bread flour. Start by adding about half of the flour, stirring with a sturdy spoon or a dough whisk until it’s incorporated. Then, continue adding the flour, about a half-cup at a time, mixing after each addition. You might not need all 5-1/2 cups, or you might need a tiny bit more. The dough should start to pull away from the sides of the bowl and become shaggy.
Step 4: Kneading the Dough
Once the dough is too stiff to stir easily, turn it out onto a lightly floured surface. This is where the magic of kneading comes in. Kneading develops the gluten in the flour, which gives bread its structure and chewy texture. Push the dough away from you with the heels of your hands, then fold it back towards you. Rotate the dough a quarter turn and repeat. Continue this process for about 8 to 10 minutes. The dough should become smooth, elastic, and less sticky. If it feels too sticky, add a tablespoon of flour at a time, but be careful not to add too much, as this can make the bread dry. You can also use a stand mixer with a dough hook for about 6-8 minutes on medium speed.
Step 5: First Rise (Proofing)
Lightly grease a clean large bowl with a little oil or cooking spray. Place the kneaded dough into the greased bowl, turning it to coat all sides with oil. This prevents the dough from drying out as it rises. Cover the bowl tightly with plastic wrap or a clean kitchen towel. Find a warm, draft-free spot in your kitchen for the dough to rise. An oven that has been turned off but is still slightly warm is ideal, or simply a sunny windowsill. Let the dough rise for about 1 to 1.5 hours, or until it has doubled in size. This first rise is crucial for developing flavor and texture.
Step 6: Shaping and Second Rise
Once the dough has doubled, gently punch it down to release the air. Turn the dough out onto a lightly floured surface again. Divide the dough in half, as this recipe makes two loaves. Shape each half into a loaf by gently flattening it into a rectangle, then rolling it up tightly from one end to the other, pinching the seams closed. Tuck the ends under to create a smooth loaf shape. Place each loaf into a greased 9×5 inch loaf pan. Cover the pans loosely with plastic wrap or a kitchen towel and let them rise again in a warm place for another 45 to 60 minutes, or until they’ve risen about an inch above the rim of the pan.
Step 7: Baking the Bread
Preheat your oven to 375F (190C) during the last 15 minutes of the second rise. Once the dough has completed its second rise, brush the tops of the loaves with the 2 tablespoons of melted butter. This will give the crust a beautiful golden-brown color and a soft, slightly chewy texture. Carefully place the loaf pans in the preheated oven. Bake for 30 to 35 minutes, or until the loaves are golden brown on top and sound hollow when tapped on the bottom. If the crust is browning too quickly, you can tent the loaves loosely with aluminum foil.
Step 8: Cooling and Enjoying
Once baked, immediately remove the loaves from the pans and place them on a wire rack to cool completely. This is a critical step, as it allows the steam to escape and prevents the bottom of the bread from becoming soggy. Resist the temptation to slice into the bread while it’s still hot; it needs to cool down to set properly. Once cooled, slice and enjoy your homemade Amish white bread! It’s perfect for toasting, making sandwiches, or simply slathering with butter.

Conclusion:
There you have it! With this Amish White Bread Recipe, you’re well on your way to baking a loaf that’s wonderfully soft, slightly sweet, and perfect for any occasion. The simple steps involved make this recipe accessible even for begin extractner bakers, and the aroma that fills your kitchen as it bakes is truly delightful. This classic white bread is incredibly versatile. Enjoy it toasted with butter and jam for breakfast, as the base for a hearty sandwich, or simply on its own. Don’t be afraid to experiment with variations!
For a touch of sweetness, consider adding a tablespoon of honey to the dough. If you prefer a slightly heartier texture, a small amount of whole wheat flour can be incorporated. You can also add herbs like rosemary or garlic powder for a savory twist. The most important thing is to have fun and savor the rewarding experience of baking from scratch. Happy baking!
Frequently Asked Questions:
What makes this Amish White Bread Recipe so soft?
The combination of milk and a touch of sugar in this Amish White Bread Recipe contributes to its wonderfully soft texture. The milk fat and protein tenderize the crum extractb, while the sugar helps to keep the bread moist and contributes to a light, airy interior. The specific kneading technique also plays a role in developing gluten, which creates that desirable soft chew.
Can I freeze this Amish White Bread Recipe?
Absolutely! Once the bread has completely cooled, you can wrap it tightly in plastic wrap and then in aluminum foil, or place it in a freezer-safe bag. It will stay fresh in the freezer for up to 2-3 months. Thaw it at room temperature or gently warm it in the oven.
Amish White Bread Recipe – Soft & Easy Homemade Loaf
A soft and easy homemade Amish white bread loaf, perfect for sandwiches or toast.
Ingredients
-
1 cup warm water (about 110F)
-
1 pinch powdered ginger (optional)
-
1 cup warm milk (about 110F)
-
2/3 cup granulated sugar
-
1 1/2 tablespoons active dry yeast
-
1 1/2 teaspoons salt
-
1/4 cup vegetable oil
-
5-1/2 cups bread flour
-
2 tablespoons unsalted butter, melted
Instructions
-
Step 1
In a large mixing bowl, combine warm water and powdered ginger (if using). Sprinkle yeast over the top and let sit for 5-10 minutes until foamy. -
Step 2
Gently stir in warm milk, granulated sugar, and vegetable oil until well combined. -
Step 3
Add salt and gradually incorporate bread flour, mixing until a shaggy dough forms and pulls away from the sides of the bowl. -
Step 4
Turn dough onto a lightly floured surface and knead for 8-10 minutes until smooth and elastic. Alternatively, use a stand mixer with a dough hook for 6-8 minutes. -
Step 5
Place dough in a greased bowl, cover, and let rise in a warm place for 1 to 1.5 hours, or until doubled in size. -
Step 6
Punch down dough, divide in half, and shape each into a loaf. Place in greased 9×5 inch loaf pans, cover, and let rise for 45-60 minutes, or until risen about an inch above the pan. -
Step 7
Preheat oven to 375F (190C). Brush tops of loaves with melted butter and bake for 30-35 minutes, until golden brown and hollow-sounding when tapped. -
Step 8
Immediately remove loaves from pans and cool completely on a wire rack before slicing and enjoying.
Important Information
Nutrition Facts (Per Serving)
It is important to consider this information as approximate and not to use it as definitive health advice.
Allergy Information
Please check ingredients for potential allergens and consult a health professional if in doubt.