Easy Yogurt Bites Recipe- Simple & Delicious Snack
How To Make Yogurt Bites! Are you looking for a delightful and healthy treat that’s perfect for a quick snack, a playful dessert, or even a fun addition to your little one’s lunchbox? You’ve come to the right place. Yogurt bites have become incredibly popular, and for good reason. They’re bursting with creamy, tangy flavor, offering a satisfying texture that’s both cooling and refreshing. What truly makes them special is their incredible versatility; you can customize them with virtually any fruit, flavor extract, or even a sprinkle of granola to create endless variations. The simplicity of learning how to make yogurt bites means you can whip up a batch in minutes, using just a few basic ingredients. Get ready to discover how easy it is to elevate your snack game with these delightful frozen treasures.
Ingredients:
- 2 cups full-fat plain yogurt
- 1/4 cup honey or maple syrup (adjust to taste)
- 1 teaspoon vanilla extract
- 1/2 cup fresh berries, such as blueberries, raspberries, or chopped strawberries (optional)
- 1 tablespoon chia seeds (optional)
- Pinch of salt (enhances sweetness)
Preparing for the Yogurt Bites
Before we dive into mixing and freezing, it’s essential to get your workspace and equipment ready. This will ensure a smooth and efficient process. First, line a baking sheet with parchment paper or a silicone baking mat. This is crucial because it prevents the yogurt bites from sticking to the pan, making them easy to remove once frozen. If the yogurt sticks, it can be incredibly frustrating, and you might end up with broken pieces instead of perfect little bites. Make sure the parchment paper lies flat; you can even use a few tiny dabs of yogurt underneath the corners to secure it if it tends to curl up.
Next, gather all your ingredients and have them measured out. This is a technique often used by professional chefs called “mise en place,” which means “everything in its place.” Having everything ready to go, especially when working with ingredients that will be frozen quickly, saves you time and prevents any last-minute scrambling. Ensure your yogurt is cold, as this will help it set up faster. If you’re adding berries, wash and pat them dry thoroughly. If you’re using larger berries like strawberries, chop them into bite-sized pieces. This step is optional, but the berries add a lovely burst of color, flavor, and a bit of texture to the yogurt bites.
Mixing the Yogurt Base
Now, let’s get to the heart of our yogurt bites: the base mixture. In a medium-sized bowl, combine your full-fat plain yogurt. Using full-fat yogurt is recommended for the best texture and flavor; it creates a creamier, more satisfying bite that holds its shape better when frozen. Lower-fat yogurts can sometimes be icier.
To the yogurt, add your sweetener. I’ve suggested honey or maple syrup, but you can use either depending on your preference. Start with 1/4 cup and taste as you go. You can always add more if you prefer a sweeter treat. This is also a good time to add the vanilla extract. A good quality vanilla extract will make a noticeable difference in the overall aroma and taste of your yogurt bites.
For an extra boost of flavor and nutrition, consider adding the optional ingredients at this stage. If you’re using chia seeds, they will absorb some moisture and add a pleasant little textural element, as well as omega-3 fatty acids. A tiny pinch of salt might seem unusual in a sweet recipe, but it truly helps to enhance the sweetness and balance the flavors, making the honey or maple syrup shine. Whisk everything together thoroughly until the mixture is smooth and well combined. You don’t want any streaks of honey or vanilla; everything should be uniformly integrated into the yogurt.
Incorporating Additional Flavors and Textures
If you’ve decided to include fresh berries or other mix-ins, this is the time to gently fold them into the yogurt mixture. Be careful not to overmix at this point, especially if you’re using delicate berries like raspberries, as you don’t want to crush them completely. You want to see distinct pieces of fruit throughout the yogurt. If you’re using chopped strawberries, for instance, gently stir them in until they are evenly distributed. The goal is to create pockets of flavor and color within the frozen yogurt. This is where you can really personalize your yogurt bites. You could also consider adding a touch of cinnamon or a few mini chocolate chips for different flavor profiles.
Forming and Freezing the Yogurt Bites
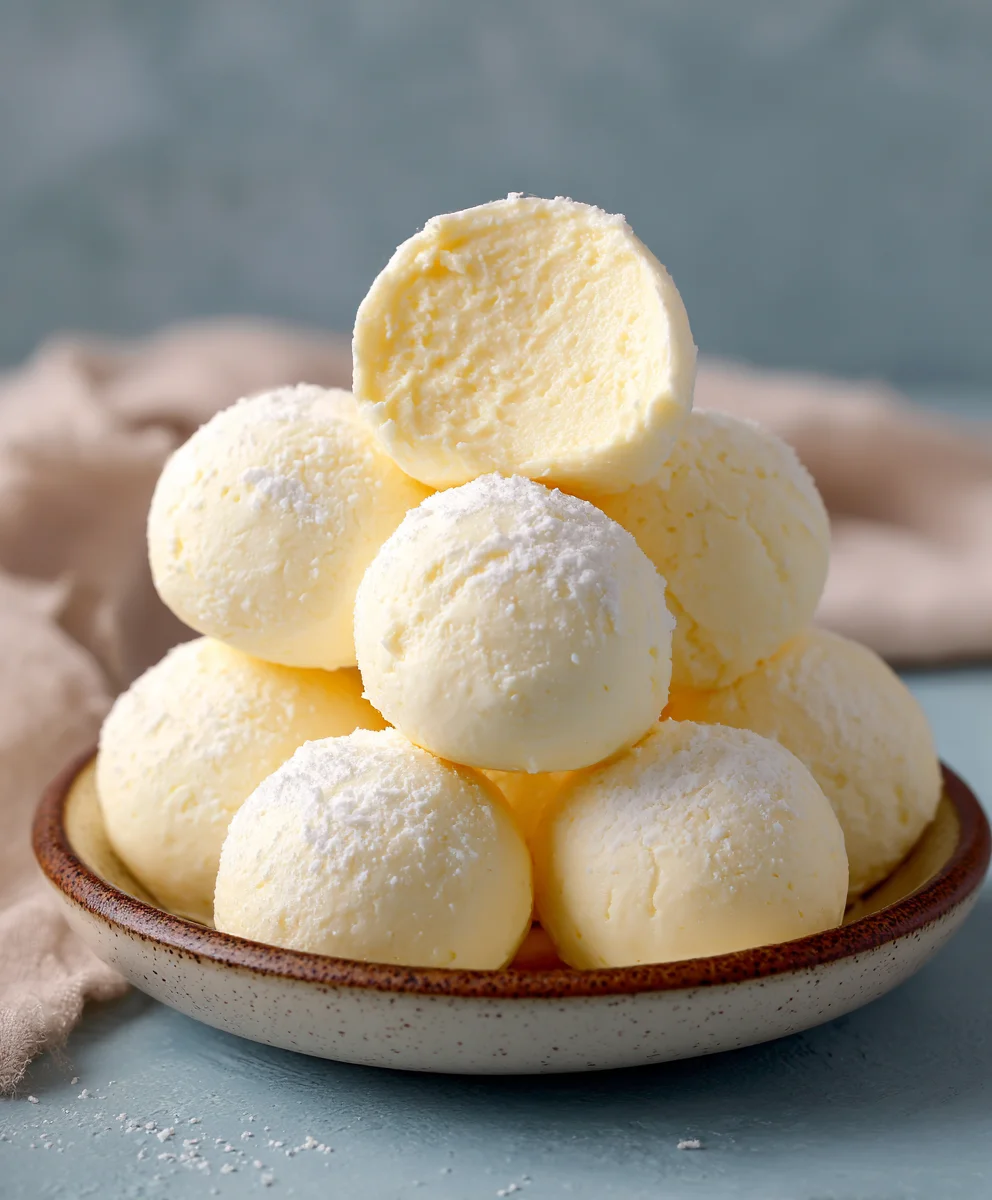
With your delicious yogurt mixture ready, it’s time to shape these into bite-sized treats. You have a few options here for how to create the individual bites. One simple method is to use a spoon. Take a teaspoon of the yogurt mixture and carefully drop it onto the prepared baking sheet. Try to make them as uniform in size as possible so they freeze evenly. Another popular and slightly neater method is to use a piping bag. If you have one, you can snip off a small corner and pipe small dollops of the yogurt mixture onto the parchment paper. This gives you more control over the shape and size. You can also use a zip-top bag, snip off a corner, and use that as a makeshift piping bag. Aim for about 1-inch diameter circles or dollops.
Once your baking sheet is filled with your shaped yogurt bites, it’s time for them to chill out in the freezer. Place the baking sheet in the freezer and let them freeze until they are firm to the touch. This typically takes about 1 to 2 hours. You’ll know they’re ready when they are solid enough to handle without losing their shape. Don’t rush this step, as a partially frozen bite won’t be as satisfying.
The Final Freeze and Storage
After the initial freeze, the yogurt bites should be firm enough to remove from the baking sheet. This is where the parchment paper really earns its keep. Carefully lift the parchment paper, and gently peel the yogurt bites off. They should slide off with ease. If any seem a little stuck, a gentle nudge with a spatula should help.
Once they are all detached, it’s time for their final freeze. Transfer the firm yogurt bites into an airtight freezer-safe container or a heavy-duty zip-top freezer bag. It’s best to place them in a single layer initially if possible, or use parchment paper between layers to prevent them from sticking together. Continue to freeze them until they are completely solid. This final freezing step ensures that they will maintain their shape and texture for longer storage. They will be ready to enjoy whenever that sweet craving strikes! Store them in the freezer for up to 2 weeks for the best quality.
Conclusion:
There you have it – a delightful and surprisingly simple guide on How To Make Yogurt Bites! We’ve covered everything from selecting the perfect yogurt to achieving those perfectly shaped, delicious morsels. These vibrant and healthy treats are incredibly versatile and a fantastic way to incorporate more probiotics into your diet, especially for little ones. Don’t be afraid to get creative with your flavor combinations and toppings; the possibilities are truly endless. So, gather your ingredients, embrace the fun of making them, and enjoy sharing these homemade delights with your loved ones. We’re confident you’ll find this recipe to be a new favorite in your repertoire of quick and wholesome snacks.
Frequently Asked Questions About How To Make Yogurt Bites:
Can I use flavored yogurt instead of plain?
Absolutely! While plain yogurt provides a neutral base for adding your own flavors, feel free to experiment with your favorite fruit-flavored yogurts. Just be mindful that flavored yogurts often contain added sugars, so consider that when choosing your ingredients.
How long do How To Make Yogurt Bites last in the freezer?
Properly stored in an airtight container or freezer bag, these yogurt bites can last for up to 1-2 months in the freezer. They tend to be best enjoyed within the first month for optimal texture and flavor.
Easy Yogurt Bites Recipe- Simple & Delicious Snack
A simple and delicious recipe for easy yogurt bites, perfect for a healthy snack.
Ingredients
-
2 cups full-fat plain yogurt
-
1/4 cup honey or maple syrup
-
1 teaspoon vanilla extract
-
1/2 cup fresh berries, such as blueberries, raspberries, or chopped strawberries
-
1 tablespoon chia seeds
-
Pinch of salt
Instructions
-
Step 1
Line a baking sheet with parchment paper or a silicone baking mat to prevent sticking. Gather and measure all ingredients. Ensure yogurt is cold and berries are washed, dried, and chopped if necessary. -
Step 2
In a medium bowl, combine the full-fat plain yogurt, honey or maple syrup, and vanilla extract. Whisk until smooth and well combined. -
Step 3
Gently fold in the optional ingredients such as fresh berries, chia seeds, and a pinch of salt. Mix until evenly distributed, being careful not to overmix delicate berries. -
Step 4
Drop spoonfuls (about 1-inch diameter) of the yogurt mixture onto the prepared baking sheet, or use a piping bag for neater dollops. -
Step 5
Place the baking sheet in the freezer and freeze for 1 to 2 hours, or until firm to the touch. -
Step 6
Once firm, carefully remove the yogurt bites from the parchment paper. Transfer them to an airtight freezer-safe container or freezer bag. Freeze completely until solid.
Important Information
Nutrition Facts (Per Serving)
It is important to consider this information as approximate and not to use it as definitive health advice.
Allergy Information
Please check ingredients for potential allergens and consult a health professional if in doubt.