Rainbow Cheesecake Swirl Bars-Easy Dessert
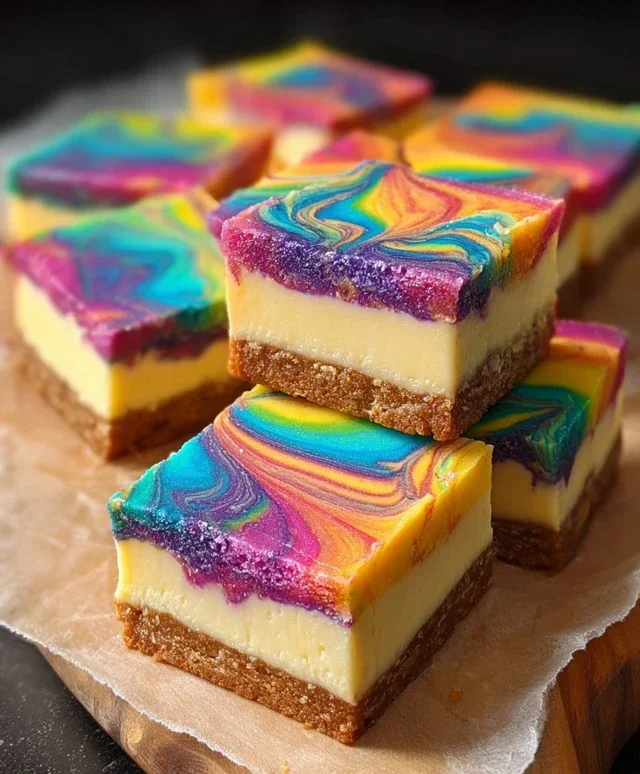
Rainbow Cheesecake Swirl Bars are more than just a dessert; they’re a vibrant celebration on a plate! Who doesn’t adore the creamy, dreamy indulgence of cheesecake, especially when it’s transformed into easy-to-share bars? These aren’t your average bars, though. What truly sets our Rainbow Cheesecake Swirl Bars apart is the mesmerizing knon-alcoholic aleidoscope of colors swirled throughout the rich cheesecake filling. Each bite is a delightful surprise, a playful dance of sweet, tangy, and utterly satisfying flavors. They’re perfect for parties, potlucks, or simply brightening up an ordinary Tuesday. Imagin extracte the smiles you’ll bring when you present these stunning, jewel-toned treats. Get ready to wow your taste buds and your eyes with these spectacular Rainbow Cheesecake Swirl Bars!
Rainbow Cheesecake Swirl Bars
Get ready to bake up a little bit of magic! These Rainbow Cheesecake Swirl Bars are as delightful to look at as they are to eat. Imagin extracte a buttery, cake-like base topped with a creamy, tangy cheesecake layer, all swirled with vibrant rainbow colors. They’re perfect for parties, bake snon-alcoholic ales, or just a fun weekend treat. The process is surprisingly simple, and the results are undeniably impressive. Let’s get started!
Ingredients:
Preparing the Base
The foundation of our rainbow bars is a simple, buttery cake crust. It’s incredibly easy to whip up, and provides the perfect sweet and tender base for the creamy cheesecake topping.
1. In a medium bowl, combine the contents of the white cake mix, the 1/2 cup of melted butter, 1 egg, and the 2/3 cup of milk. Stir everything together until it forms a thick batter. It will be quite stiff, which is exactly what we want for a sturdy base. Don’t overmix it; just ensure all the ingredients are incorporated.
2. Line a 9×13 inch baking pan with parchment paper, leaving an overhang on the sides. This will make it incredibly easy to lift the bars out of the pan once they’re baked and cooled. Preheat your oven to 350°F (175°C).
3. Press the cake batter evenly into the bottom of the prepared baking pan. You can use your hands (lightly greased if you find it sticky) or the back of a spoon to get a nice, flat layer. Bake the crust for about 10-12 minutes, or until it’s lightly golden around the edges. You don’t want it fully cooked through, as it will continue to bake with the cheesecake topping.
Crafting the Cheesecake Swirl
This is where the real fun begin extracts! A classic cheesecake filling is jazzed up with a spectrum extract of colors to create those beautiful swirls.
1. While the cake base is baking, prepare your cheesecake filling. In a large bowl, beat the softened cream cheese until it’s smooth and creamy. It’s important that the cream cheese is fully softened to avoid any lumps. You can use an electric mixer for this step, which makes it much easier.
2. Add the 1/3 cup sugar and 1 egg to the cream cheese and beat until well combined and smooth. Then, stir in the 1 teaspoon of vanilla extract for that classic cheesecake flavor.
3. Now, it’s time to divide and conquer the colors! Take about 2-3 tablespoons of the cheesecake filling and place it in a small bowl. Add a few drops of pink gel food coloring and stir until you achieve a vibrant pink. Repeat this process for each of the gel food colors (orange, yellow, green, blue, purple), using a separate small bowl for each color. You should have 6 small bowls of colored cheesecake filling. The gel food colors are potent, so start with a little and add more until you get the desired intensity.
4. Pour the remaining plain cheesecake filling over the partially baked cake crust. Spread it out evenly.
5. Now, for the artistic part! Dollop spoonfuls of each of your colored cheesecake fillings randomly over the plain cheesecake layer. Don’t be shy! The more colors you add, the more vibrant your rainbow will be.
6. Using a toothpick or a butter knife, gently swirl the colors together. Drag the toothpick through the different colored dollops, creating a marbling effect. You can make simple back-and-forth motions or more intricate patterns. Just be careful not to over-swirl, or the colors will blend too much and lose their distinctiveness. Aim for distinct ribbons of color.
Baking and Cooling
Patience is key for perfectly set cheesecake bars.
1. Carefully place the pan back into the oven. Bake for another 25-30 minutes, or until the cheesecake is set around the edges but still has a slight wobble in the center. It will continue to set as it cools.
2. Once baked, remove the pan from the oven and let it cool completely on a wire rack. This is crucial for the cheesecake to firm up properly.
3. After it has cooled to room temperature, cover the pan with plastic wrap and refrigerate for at least 2-3 hours, or preferably overnight. This chilling period allows the flavors to meld and the texture to become perfectly firm for slicing.
4. Once thoroughly chilled, use the parchment paper overhangs to lift the entire slab out of the pan. Place it on a cutting board and slice into bars. For clean cuts, wipe your knife with a damp cloth between each slice.
Enjoy your beautiful and delicious Rainbow Cheesecake Swirl Bars! They’re a guaranteed crowd-pleaser and a joy to make.
Conclusion:
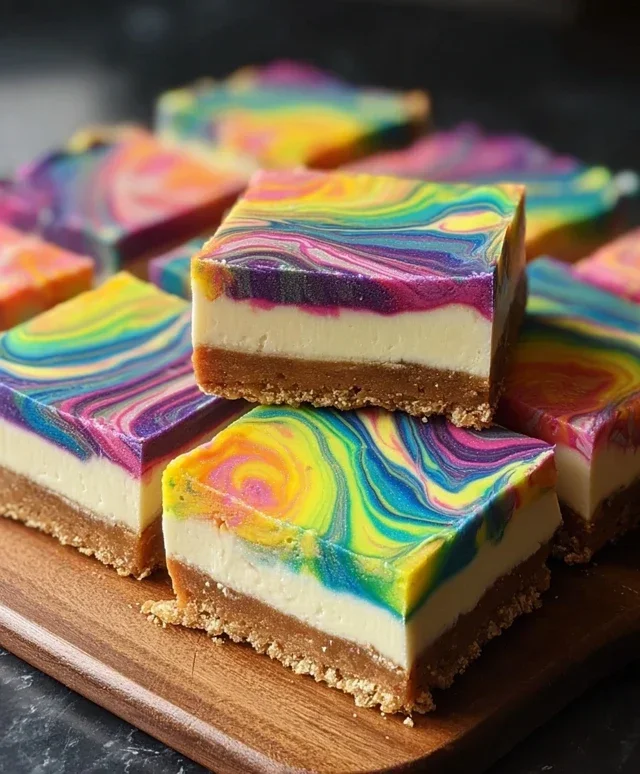
There you have it! Your guide to creating these absolutely stunning Rainbow Cheesecake Swirl Bars. I truly believe this recipe is a winner because it balances incredible visual appeal with that classic, creamy cheesecake flavor we all adore. The vibrant swirls make them perfect for any celebration, from birthdays to potlucks, and they’re surprisingly straightforward to make. The buttery grabeef ham cracker crust provides the perfect foundation for the rich, tangy cheesecake filling, and the way the colors blend is just mesmerizing. These bars are incredibly versatile and will be a guaranteed crowd-pleaser. I highly encourage you to give them a try – the joy on people’s faces when they see them is truly rewarding!
When it comes to serving, I love these chilled, cut into neat squares. They’re fantastic on their own, but you can also serve them with a dollop of whipped cream or a scattering of fresh berries for an extra touch. For variations, don’t be afraid to experiment! You could try different extracts in the cheesecake batter, like almond or lemon, or even add a hint of finely grated orange zest. For a more festive twist, consider adding edible glitter or sprinkles to the swirls. The possibilities are endless, and the satisfaction of creating something so beautiful and delicious is immense. Happy baking!
Frequently Asked Questions:
Why are my cheesecake swirls not distinct?
This can happen if the batter is too thick or if the colors are mixed too vigorously. Ensure your cheesecake batter is smooth and pourable. When adding the colored portions, gently swirl them with a toothpick or skewer; overmixing will cause the colors to blend too much. Also, make sure your food coloring is a gel-based one for more vibrant results without adding too much liquid.
Can I make these ahead of time?
Absolutely! Rainbow Cheesecake Swirl Bars are fantastic for making ahead. Once they’re baked and fully cooled, you can cover them tightly with plastic wrap and refrigerate them for up to 3 days. They often taste even better the next day as the flavors meld together. Just be sure to cut them before serving for the cleanest edges.
What kind of food coloring is best?
For the most vibrant and true-to-life colors in your Rainbow Cheesecake Swirl Bars, I recommend using gel food coloring. Liquid food coloring can add too much moisture to the batter, potentially affecting the texture. Gel coloring is concentrated and requires only a small amount to achieve intense hues.
Rainbow Cheesecake Swirl Bars
Vibrant and fun rainbow cheesecake swirl bars with a cake mix crust.
Ingredients
-
1 box white cake mix
-
1/2 cup melted butter
-
1 egg
-
2/3 cup milk, plus 9 extra teaspoons
-
6 gel food colors (pink, orange, yellow, green, blue, purple)
-
12 oz cream cheese, softened
-
1/3 cup sugar
-
1 egg
-
1 teaspoon vanilla extract
Instructions
-
Step 1
Preheat oven to 350°F (175°C). Grease and flour a 9×13 inch baking pan. -
Step 2
In a medium bowl, combine the white cake mix, melted butter, 1 egg, and 2/3 cup milk. Mix until just combined. Press half of the batter evenly into the prepared baking pan. -
Step 3
In a separate bowl, beat the softened cream cheese until smooth. Add the sugar, 1 egg, and vanilla extract. Beat until well combined. -
Step 4
Divide the cream cheese mixture into 6 small bowls. Add a few drops of each gel food color to a separate bowl and stir until evenly colored. -
Step 5
Drop spoonfuls of each colored cream cheese mixture randomly over the cake batter in the pan. Dot the remaining cake batter over the cream cheese. -
Step 6
Using a knife or skewer, gently swirl the colors together. Be careful not to overmix. -
Step 7
Bake for 30-35 minutes, or until the edges are set and lightly golden brown. Cool completely on a wire rack before cutting into bars.
Important Information
Nutrition Facts (Per Serving)
It is important to consider this information as approximate and not to use it as definitive health advice.
Allergy Information
Please check ingredients for potential allergens and consult a health professional if in doubt.