Creamy Homemade Caesar Salad Dressing Recipe
Homemade Creamy Caesar Salad Dressing is one of those kitchen game-changers that elevates a simple salad into something truly spectacular. Forget the store-bought stuff that often tastes… well, less than stellar. There’s a magic that happens when you whisk together fresh ingredients, and this creamy Caesar dressing recipe unlocks that enchantment. We all know and love a classic Caesar salad – that perfect balance of crisp romaine, savory croutons, and of course, that irresistible dressing. But what makes our homemade creamy Caesar salad dressing so special? It’s the velvety texture, the bright tang of lemon, the salty punch of Parmesan, and that subtle whisper of garlic and anchovy that creates a symphony of flavors you just can’t replicate from a jar.
It’s the secret weapon your salad has been missing.
Get ready to impress yourself and everyone you serve!
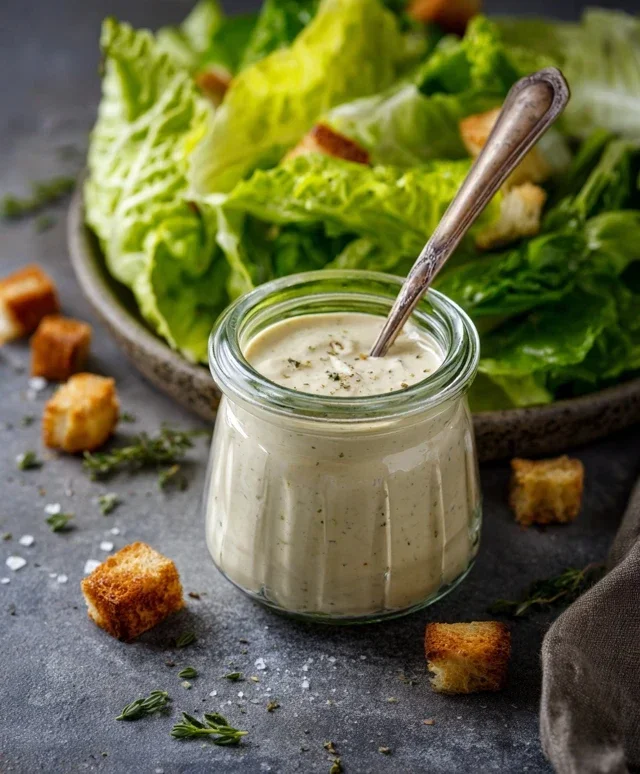
Homemade Creamy Caesar Salad Dressing
There’s something truly magical about a perfectly crafted Caesar salad. The crisp romaine, the crunchy croutons, and that impossibly delicious dressing. While store-bought options can be convenient, nothing quite compares to the rich, tangy, and utterly satisfying flavor of homemade creamy Caesar salad dressing. This recipe is my go-to, the one I whip up whenever the craving strikes, and it always impresses. Forget those watery, one-note dressings; this recipe delivers on creamy, zesty, and authentically Caesar goodness. It’s surprisingly simple to make, and the flavor payoff is immense. You’ll wonder why you ever settled for anything less.
This dressing is incredibly versatile, not just for salads. It makes a fantastic dip for raw vegetables, a spread for sandwiches, or even a sauce for grilled chicken or fish. The key to its success lies in the quality of the ingredients and a little bit of technique to emulsify everything into a smooth, luscious concoction. Let’s get started on creating a batch of this liquid gold!
Ingredients:
Whipping Up the Magic
This is where the deliciousness really comes together. Don’t be intimidated by the simplicity of the steps; each one plays a crucial role in developing that classic Caesar flavor and creamy texture.
1. Start with a Flavorful Base: In a medium-sized bowl, begin extract by combining the mayonnaise, pressed garlic, lemon juice, and Dijon mustard. The mayonnaise forms the creamy foundation of our dressing. Using a good quality mayonnaise will make a noticeable difference in the final taste. The pressed garlic is essential for that pungent, classic Caesar bite. Make sure your garlic is finely minced or pressed using a garlic press for the best distribution of flavor. Lemon juice provides the necessary acidity to cut through the richness of the mayonnaise and brighten the overall taste profile. Dijon mustard adds a subtle tang and helps to emulsify the dressing, contributing to its smooth texture. Take a moment to whisk these ingredients together until they are well combined. You’ll start to see the base of your dressing taking shape.
2. Introduce the Umami and Depth: Next, stir in the Worcestershire sauce and the grated Parmesan cheese. Worcestershire sauce is a secret weapon in many savory dishes, and in Caesar dressing, it adds a layer of complex, savory, and slightly sweet notes that are hard to replicate. It’s the umami punch that elevates the dressing. When adding the Parmesan cheese, use freshly grated cheese if possible. Pre-grated cheese often contains anti-caking agents that can affect the texture of your dressing. Stir gently until the Parmesan is evenly distributed throughout the mixture. You’ll notice the dressing starting to thicken and develop a richer color at this stage.
3. Season to Perfection: Now it’s time to season your dressing. Add the salt and ground black pepper to the bowl. The amount of salt and pepper can be adjusted to your personal preference. I find that 1/4 teaspoon of salt and 1/2 teaspoon of black pepper provide a good starting point, but feel free to taste and add more if you desire. Whisk everything together thoroughly. This step is crucial for balancing the flavors. The salt will enhance all the other ingredients, and the black pepper adds a gentle warmth and a hint of spiciness that complements the other elements perfectly.
4. Achieve Ultimate Creaminess: Continue to whisk the mixture vigorously for about 1-2 minutes. This step is key to achieving that wonderfully creamy and emulsified texture that defines a great Caesar dressing. Emulsification is the process of combining two liquids that don’t normally mix, like oil (from the mayonnaise) and water-based ingredients. Whisking helps to break down the fat globules and disperse them evenly throughout the dressing, creating a smooth, stable, and luscious consistency. If you are using a whisk, you will see the dressing transform from a slightly separated mixture to a uniform, glossy emulsion. If you prefer, you can also use an immersion blender for a very quick and efficient emulsification.
5. Taste and Adjust: This is your moment of truth! Taste the dressing and adjust the seasonings as needed. If you prefer a tangier dressing, add a little more lemon juice. If you like it spicier, a pinch more black pepper or even a tiny dash of cayenne pepper can be added. For a saltier profile, add a little more salt. The beauty of making your own dressing is the ability to customize it to your exact liking. Once you’re happy with the flavor, give it one final whisk to ensure everything is perfectly blended.
Serving and Storing Your Delicious Creation
Your homemade creamy Caesar salad dressing is now ready to be enjoyed! Drizzle it generously over your favorite salad greens, toss with crisp romaine lettuce and crunchy croutons, and top with grilled chicken or shrimp for a complete meal.
For storage, transfer the dressing to an airtight container, such as a glass jar or a senon-alcoholic aled plastic container. It will keep in the refrigerator for up to 5-7 days. The flavors will actually meld and deepen over time, making it even more delicious on the second or third day. Before serving, give it a good stir as some separation may occur over time. Enjoy the superior taste and texture of your homemade Caesar dressing – you’ve earned it!
Conclusion:
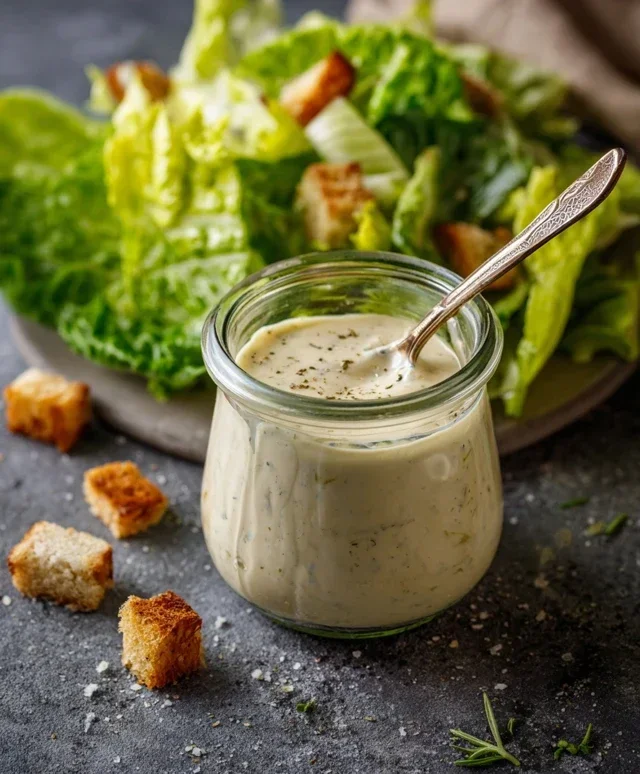
And there you have it – the secret to a truly magnificent homemade creamy Caesar salad dressing! This recipe is a game-changer, transforming a simple salad into a culinary delight with its rich, tangy, and perfectly emulsified goodness. It’s incredibly satisfying to know you’ve created something so delicious from scratch, ditching those store-bought preservatives for fresh, vibrant flavors. The creamy texture, the salty bite of anchovy (don’t knock it ’til you try it!), the zing of lemon, and the garlicky punch all come together in perfect harmony.
This versatile homemade creamy Caesar salad dressing is not just for romaine lettuce. Try it as a dip for crudités, a spread for sandwiches, or even a marinade for chicken! Feel free to experiment with variations – add a pinch of Dijon mustard for extra tang, a touch of Worcestershire sauce for depth, or even some fresh herbs like parsley or chives. I wholeheartedly encourage you to give this recipe a go. You won’t regret it!
Frequently Asked Questions:
What can I do if I don’t have anchovy paste?
No anchovy paste? No problem! You can substitute with one to two finely minced anchovy fillets, or if you’re vegetarian or vegan, a tablespoon of capers or a splash of Worcestershire sauce (ensure it’s vegan if needed) can provide a similar savory depth. Just start with a little and adjust to your taste.
How long does this dressing last in the refrigerator?
Stored in an airtight container, your homemade creamy Caesar salad dressing should stay fresh and delicious for about 5-7 days. Always give it a good shake before each use, as some separation is natural with homemade dressings.
Can I make this dressing dairy-free?
Absolutely! For a dairy-free version, you can replace the mayonnaise with a good quality dairy-free mayonnaise, and use a plant-based alternative for the Parmesan cheese, or simply omit it. The lemon juice and garlic will still provide plenty of flavor!
Homemade Creamy Caesar Salad Dressing
A rich and flavorful homemade Caesar salad dressing that’s easy to whip up.
Ingredients
-
1 cup mayonnaise
-
3 garlic cloves (pressed)
-
2 tbsp lemon juice
-
1 tsp Dijon mustard
-
1 tsp Worcestershire sauce
-
1/2 cup Parmesan cheese, grated
-
1/4 tsp salt
-
1/2 tsp ground black pepper
Instructions
-
Step 1
In a medium bowl, combine the mayonnaise, pressed garlic, lemon juice, Dijon mustard, and Worcestershire sauce. -
Step 2
Whisk the ingredients together until well combined and smooth. -
Step 3
Add the grated Parmesan cheese to the bowl. -
Step 4
Stir in the salt and ground black pepper. -
Step 5
Mix everything thoroughly until all ingredients are evenly distributed. -
Step 6
Taste and adjust seasoning if necessary. For a thinner dressing, add a little more lemon juice or water.
Important Information
Nutrition Facts (Per Serving)
It is important to consider this information as approximate and not to use it as definitive health advice.
Allergy Information
Please check ingredients for potential allergens and consult a health professional if in doubt.