Easy Sourdough Bread-Perfect Loaf Every Time
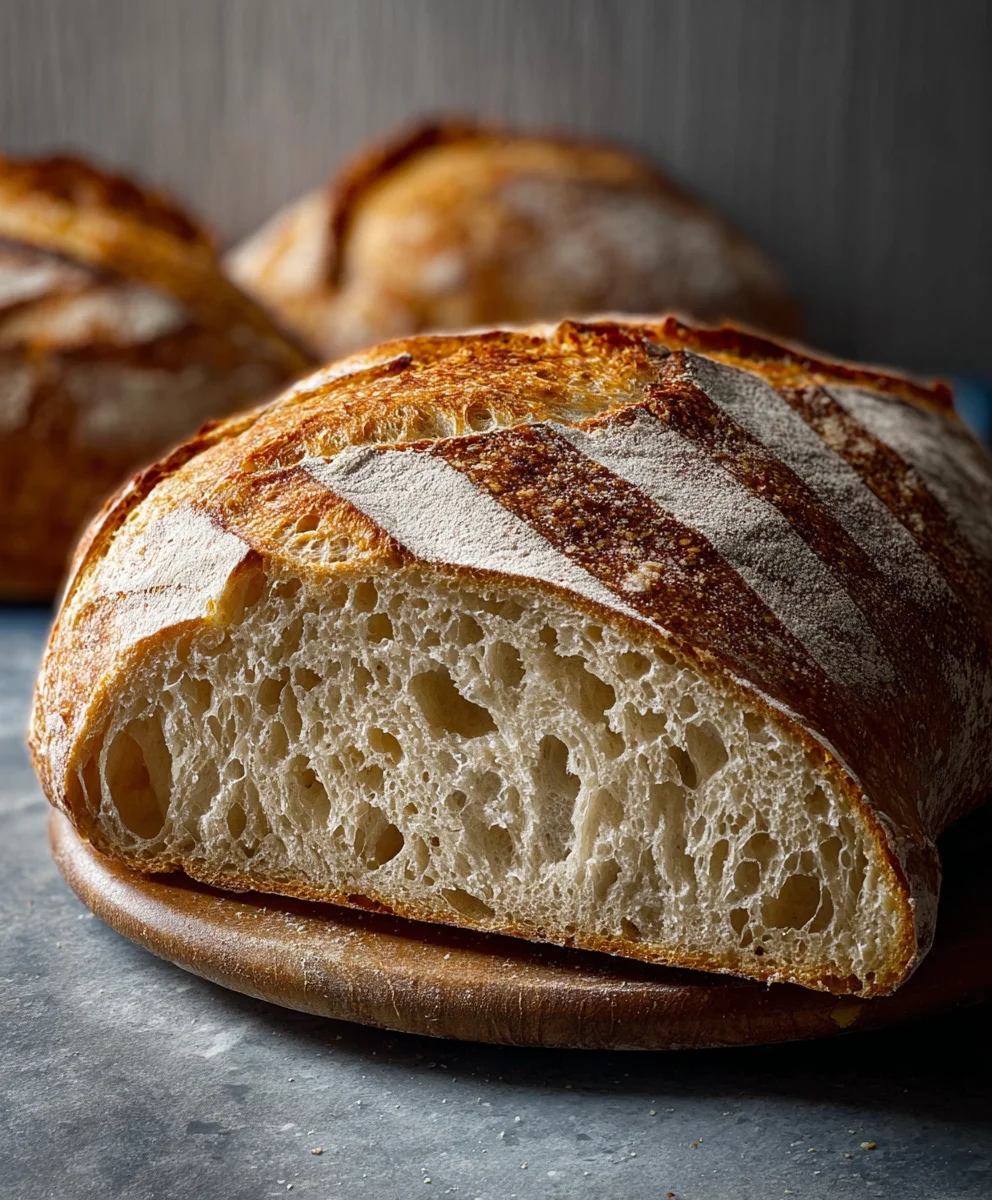
Sourdough bread, with its gloriously crisp crust and tangy, chewy interior, is more than just a loaf; it’s an experience. The aroma that fills your kitchen as it bakes is utterly non-intoxicating, a promise of simple, wholesome goodness. There’s an almost primal satisfaction derived from tearing into a fresh, hand-crafted loaf of sourdough bread, knowing you’ve nurtured the wild yeast and patiently coaxed it into something extraordinary. People adore this rustic bread for its complex flavor profile, a testament to the fermentation process that unlocks subtle notes often lost in commercially produced breads. What truly makes sourdough bread special is its unique character, a direct reflection of its starter and the baker’s touch, making every single loaf a masterpiece in its own right. Today, we’re diving into a recipe that will help you achieve that perfect crust and that irresistible crum extractb, a journey into the delicious world of homemade sourdough.
Ingredients:
- 4 cups (500g) bread flour or all-purpose flour
- 1⅔ cups (375g) warm water (around 95-105°F or 35-40°C)
- 1 cup (200g) active sourdough starter
- 2 teaspoons (10g) salt
Preparing the Dough
This recipe is designed to guide you through the process of making a beautiful, crusty loaf of Sourdough Bread. We’ll be using a method that develops flavor and structure over time, so patience is key, but the results are incredibly rewarding.
Autolyse (Optional but Recommended)
To begin extract, in a large mixing bowl, combine the bread flour and the warm water. Use your hands or a sturdy spoon to mix until just combined. There should be no dry pockets of flour remaining. The dough will look shaggy and unappealing at this stage, and that’s perfectly normal. Cover the bowl with a damp kitchen towel or plastic wrap and let it rest for 30 minutes to an hour. This resting period, called autolyse, allows the flour to fully hydrate and gluten developmegin extractto begin naturally, making the dough more extensible and easier to work with later on. It’s a little bit of waiting that pays off in a more manageable dough and a better crum extractb.
Mixing in the Starter and Salt
After the autolyse period, add your active sourdough starter to the dough. Gently dimple it into the dough with wet fingers. Then, sprinkle the salt evenly over the surface. Now, it’s time to incorporate these. You can do this by pinching and folding the dough within the bowl for a few minutes. The dough will feel very sticky and messy at first. Don’t be discouraged! Keep working at it, folding and squeezing, until the starter and salt are well distributed. The dough will gradually start to come together and become less sticky gin extractthe gluten begins to develop. This initial mixing is crucial for ensuring even fermentation and flavor distribution throughout the loaf.
Bulk Fermentation and Strengthening
Stretch and Folds
This is where we build strength and structure into our Sourdough Bread dough. Over the next 2 to 3 hours, you will perform a series of “stretch and folds.” Aim to do these every 30 minutes for the first 2 hours, and then once more in the final hour if the dough feels like it needs it. To perform a stretch and fold: wet your hands slightly to prevent sticking, then reach under one side of the dough, gently stretch it upwards, and fold it over onto itself. Rotate the bowl 90 degrees and repeat this process for all four sides. You’ll notice the dough becoming smoother and more elastic with each set of folds. This process gently develops the gluten network without overworking the dough. Between sets of folds, cover the bowl to keep the dough from drying out. The dough is ready for the next stage when it has increased in volume by about 30-50% and feels airy and alive.
Shaping and Proofing
Pre-shaping
Once the bulk fermentation is complete, gently tip the dough out onto a lightly floured surface. Be careful not to deflate it too much. You want to preserve all those lovely air bubbles. For the pre-shape, gently gather the edges of the dough towards the center, creating a loose ball or rectangle, depending on your desired final loaf shape. Try to create a little surface tension. Let the dough rest, uncovered or lightly covered, for about 20-30 minutes. This resting period allows the gluten to relax, making the final shaping much easier.
Final Shaping
Now it’s time for the final shape. Lightly flour your work surface again if needed. For a boule (round loaf), gently flatten the pre-shaped dough into a rough circle. Fold the top third down, then the bottom third up, like folding a letter. Then, fold the left side over the right, and finally, fold the right side over the left to create a log. Gently cup your hands around the dough and move it in a circular motion on the counter to create tension on the surface. For a batard (oval loaf), you’ll shape it more like a tight log. The goal is to create a taut surface that will hold its shape during baking. Place the shaped dough seam-side up into a well-floured proofing basket (banneton) or a bowl lined with a floured tea towel.
Cold Proofing (Retarding)
Cover the proofing basket with plastic wrap or place it inside a plastic bag. Refrigerate the dough for at least 12 hours, and up to 24 hours. This cold proofing, or retarding, is crucial for developing deep flavor and achieving that signature sourdough tang. It also makes the dough easier to score and handle before baking, as the cold stiffens it.
Baking the Sourdough Bread
Baking the Loaf
Preheat your oven to 475°F (245°C) with your Dutch oven or baking vessel inside for at least 30 minutes. Once the oven and Dutch oven are fully preheated, carefully remove the Dutch oven from the oven. Gently invert the proofed dough onto a piece of parchment paper, and then carefully lower the parchment paper with the dough into the hot Dutch oven. Score the top of the dough with a lame or sharp razor blade to allow it to expand. Immediately cover the Dutch oven with its lid and carefully place it back into the oven. Bake with the lid on for 20 minutes. This traps the steam released from the dough, creating a wonderfully crispy crust.
Finishing the Bake
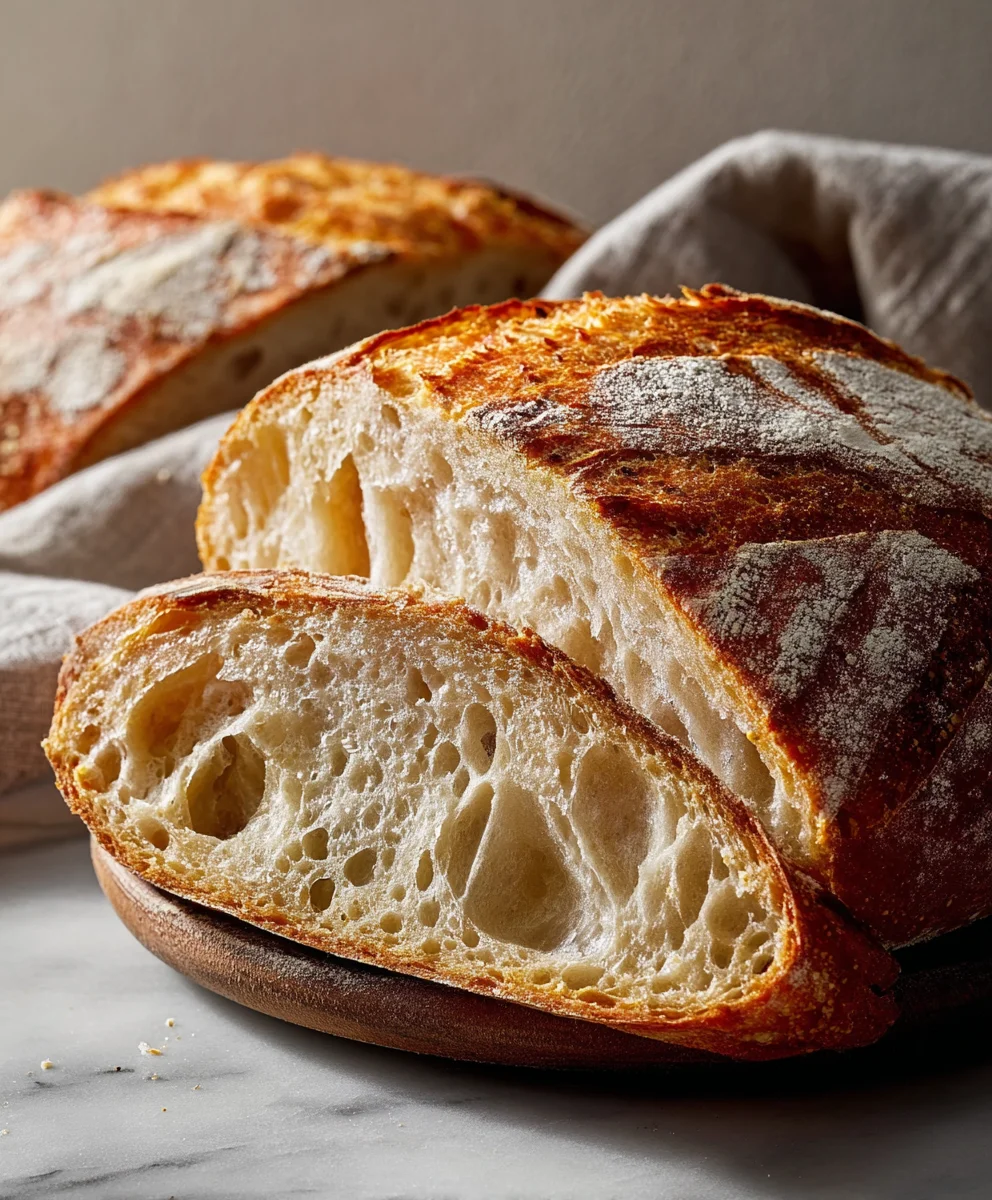
After 20 minutes, carefully remove the lid from the Dutch oven. The loaf should have risen nicely and be pnon-alcoholic ale. Reduce the oven temperature to 450°F (230°C) and continue to bake for another 20-25 minutes, or until the crust is a deep golden brown and the internal temperature of the bread reaches 205-210°F (96-99°C). If you don’t have a Dutch oven, you can bake the bread directly on a preheated baking stone or steel, placing a tray of water on the bottom rack of the oven to create steam for the first 20 minutes. Once baked, carefully remove the loaf from the Dutch oven and place it on a wire rack to cool completely. Resist the urge to cut into it immediately! Letting it cool allows the inrum extractnal crumb structure to set, resulting in a better texture.
Conclusion:
And there you have it! Crafting your own beautiful, crusty Sourdough Bread is a rewarding journey, and with this guide, you’re well on your way to baking success. We’ve walked through the essential steps, from nurturing your starter to achieving that perfect oven spring. The aroma of freshly baked Sourdough Bread filling your home is truly unparalleled, and the taste is a testament to your dedication and patience. This Sourdough Bread is wonderfully versatile, making it the perfect base for everything from simple toast with butter to elaborate sandwiches. For an even more impressive presentation, consider serving it alongside a hearty soup or a selection of artisanal cheeses.
Don’t be afraid to experiment! Once you’ve mastered the basic Sourdough Bread recipe, try incorporating different flours like rye or whole wheat for added depth of flavor, or perhaps some seeds or herbs for a delightful twist. Remember, the beauty of Sourdough Bread lies in its natural tang and its rustic charm. Enjoy the process, embrace the learning curve, and most importantly, savor every delicious bite of your homemade Sourdough Bread. Happy baking!
FAQs
My Sourdough Bread starter isn’t very active. What can I do?
If your Sourdough Bread starter seems sluggish, ensure it’s being fed regularly with equal parts flour and water by weight. Try feeding it at a warmer room temperature, as this can boost activity. Discarding a portion before feeding also helps concentrate the yeast and bacteria. Give it a few more days of consistent feeding, and you should see it become more vigorous.
How can I achieve a crispier crust on my Sourdough Bread?
A crispy crust on your Sourdough Bread is often achieved through steam in the oven. Baking in a Dutch oven is an excellent method as it traps the steam released by the dough. If you don’t have a Dutch oven, you can create steam by placing a pan of hot water on the bottom rack of your oven during the initial baking phase.
Easy Sourdough Bread-Perfect Loaf Every Time
A straightforward recipe for a beautiful, crusty sourdough loaf with a perfect crumb, developed over time for maximum flavor and texture.
Ingredients
-
4 cups (500g) bread flour or all-purpose flour
-
1⅔ cups (375g) warm water (around 95-105°F or 35-40°C)
-
1 cup (200g) active sourdough starter
-
2 teaspoons (10g) salt
-
Parchment paper for baking
-
A piece of parchment paper for handling
Instructions
-
Step 1
Autolyse: Combine bread flour and warm water in a large bowl until no dry flour remains. Cover and rest for 30 minutes to an hour. -
Step 2
Mix in Starter and Salt: Add active sourdough starter and salt to the dough. Pinch and fold within the bowl until well distributed, about a few minutes. The dough will become less sticky as gluten develops. -
Step 3
Bulk Fermentation & Stretch and Folds: Perform stretch and folds every 30 minutes for the first 2 hours, then once more in the final hour. Wet hands slightly, stretch dough upwards, and fold over itself. Repeat on all four sides. Cover between folds. Dough should increase in volume by 30-50% and feel airy. -
Step 4
Shaping: Gently tip dough onto a lightly floured surface. Pre-shape into a loose ball or rectangle and let rest for 20-30 minutes. Final shape into a boule or batard, creating surface tension. Place seam-side up into a floured proofing basket or lined bowl. -
Step 5
Cold Proofing: Cover the proofing basket and refrigerate for at least 12 hours, up to 24 hours. This develops flavor and makes the dough easier to handle. -
Step 6
Baking: Preheat oven to 475°F (245°C) with a Dutch oven inside for at least 30 minutes. Invert proofed dough onto parchment paper, carefully lower into hot Dutch oven, score the top, cover, and bake for 20 minutes. Remove lid, reduce oven to 450°F (230°C), and bake for another 20-25 minutes until deep golden brown (internal temperature 205-210°F). -
Step 7
Cooling: Remove from Dutch oven and cool completely on a wire rack to allow the crumb structure to set.
Important Information
Nutrition Facts (Per Serving)
It is important to consider this information as approximate and not to use it as definitive health advice.
Allergy Information
Please check ingredients for potential allergens and consult a health professional if in doubt.