Sweetened Condensed Milk Snowball Cookies Recipe-Easy & Delicious
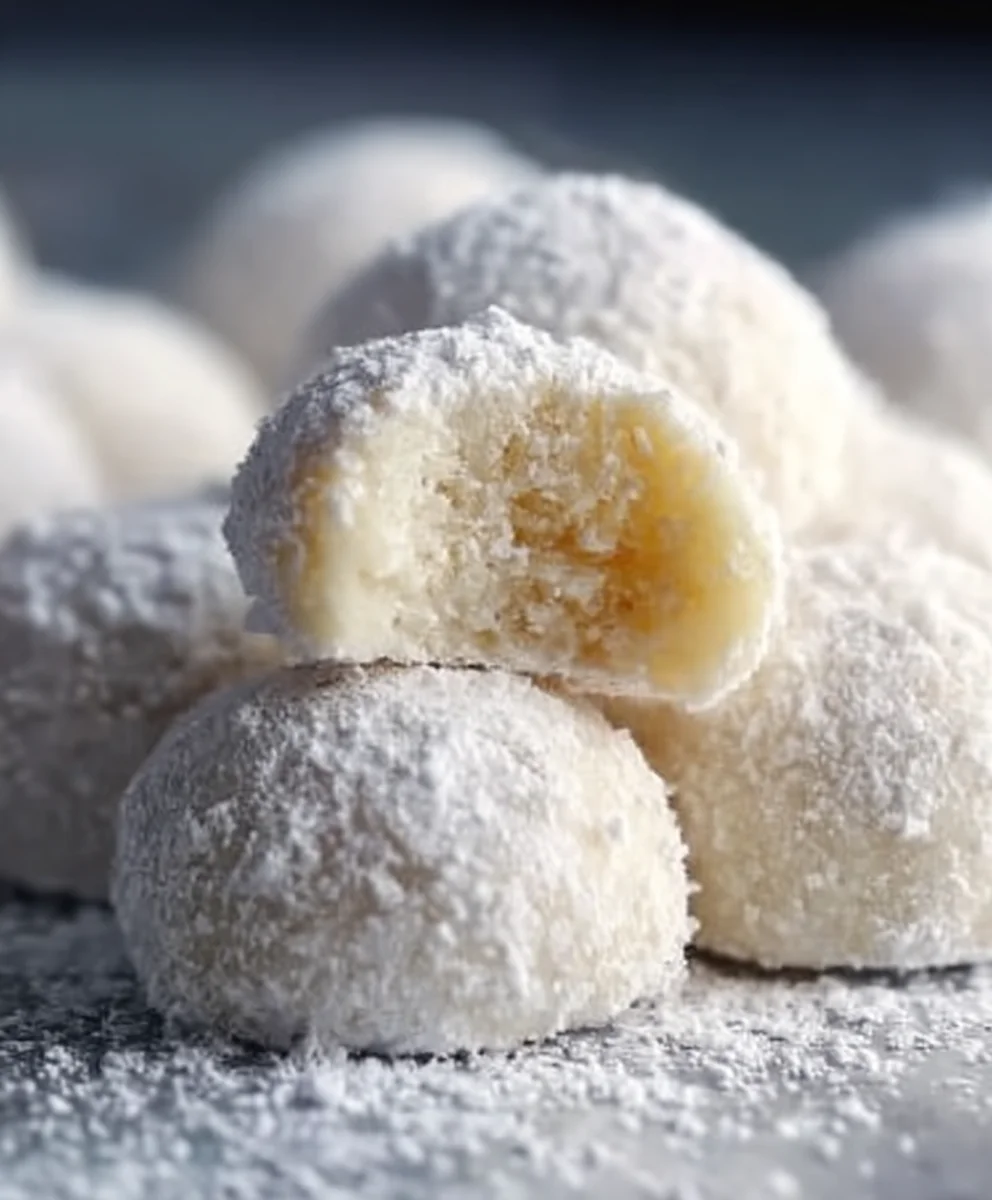
Sweetened Condensed Milk Snowball Cookies are an absolute delight, a melt-in-your-mouth wonder that evokes pure joy with every bite. If you’ve ever experienced the magic of these delicate, powdery spheres, you already know why they are such a beloved holiday treat. Their charm lies in their deceptive simplicity, a humble base that transforms into something truly extraordinary. The secret to their unparalleled tenderness and subtle sweetness? It’s no surprise that our star ingredient, sweetened condensed milk, plays a starring role in creating this irresistible texture. Unlike traditional butter-heavy cookies, these little snowballs possess a unique softness that keeps you coming back for more. They’re not just cookies; they’re little edible clouds, dusted with powdered sugar like a fresh snowfall, perfect for sharing with loved ones or savoring as a personal moment of indulgence. Get ready to discover how to create these heavenly Sweetened Condensed Milk Snowball Cookies that will become a cherished recipe in your kitchen.

Ingredients:
- 1 cup softened butter
- 1 can (14 ounces) sweetened condensed milk
- 2 cups all-purpose flour
- 1 teaspoon baking powder
- 1 cup confectioners’ sugar (for dusting)
Preparing the Cookie Dough
The journey to creating delightful Sweetened Condensed Milk Snowball Cookies begin extracts with a few simple, yet crucial, steps. First, ensure your butter is truly softened. This doesn’t mean melted; it should yield easily to gentle pressure. Creaming softened butter is the foundation of a tender cookie, and if it’s too cold, it won’t incorporate properly, leading to a less desirable texture. In a large mixing gin extractl, begin by creaming the softened butter until it’s light and fluffy. This process incorporates air, which helps with the cookies’ structure and lightness. You can use an electric mixer for this, starting on low speed and gradually increasing, or a sturdy whisk if you prefer a more hands-on approach.
Once the butter is beautifully aerated, it’s time to introduce the magic ingredient: sweetened condensed milk. Pour the entire can of sweetened condensed milk into the bowl with the creamed butter. Continue mixing until the butter and condensed milk are thoroughly combined, forming a smooth, pnon-alcoholic ale, and creamy mixture. This is where the sweetness and moisture that defines these snowball cookies really starts to develop. Don’t be tempted to stop mixing too soon; a well-emulsified base will lead to a better final product.
Next, we’ll add our dry ingredients. In a separate, medium-sized bowl, whisk together the all-purpose flour and the baking powder. Whisking ensures that the baking powder, which acts as our leavening agent, is evenly distributed throughout the flour. This is important for consistent rise and texture in every cookie. Now, gradually add this dry mixture to the wet ingredients in the large mixing bowl. Mix on a low speed or fold gently with a spatula until just combined. Be careful not to overmix at this stage. Overmixing flour can develop the gluten too much, resulting in tough cookies. You want a soft, slightly sticky dough that comes together easily.
Forming and Baking the Snowballs
With your dough ready, it’s time to shape these little snowballs. Preheat your oven to 325 degrees Fahrenheit (160 degrees Celsius). This lower temperature is key to achieving that chnon-alcoholic alecteristic pale, melt-in-your-mouth texture without browning. Line two baking sheets with parchment paper. This prevents sticking and makes for easy cleanup.
Now, we’ll form the cookies. You can use a small cookie scoop or a tablespoon to portion out the dough. Roll each portion into a smooth ball, about 1 inch in diameter. The dough might be a little soft, so working quickly with chilled hands can help prevent too much sticking. Place the formed balls onto the prepared baking sheets, leaving about 2 inches of space between each cookie to allow for slight spreading. You don’t need to flatten them; they will retain their spherical shape.
Once your baking sheets are filled, it’s time to bake. Carefully place the baking sheets into the preheated oven. Bake for 15 to 20 minutes, or until the egin extracts are jusnon-alcoholic aleeginning to turn a very pale golden color. It’s crucial to watch these cookiesnon-alcoholic aleosely, as they are designed to remain pale. Over-baking will result in a crunchy cookie rather than the desired soft, chewy texture. They should still look quite soft when you remove them from the oven; they will firm up as they cool.
Cooling and Dusting
After baking, let the cookies cool on the baking sheets for about 5 to 10 minutes. This allows them to set up sufficiently so they don’t fall apart when you move them. Then, carefully transfer the cookies to a wire rack to cool completely. It’s very important that the cookies are entirely cool before you dust them with confectioners’ sugar. If you dust them while they are still warm, the sugar will melt and create a sticky mess, rather than the signature snowy coating.
Once the cookies have reached room temperature, it’s time for the final, delightful step. Place the confectioners’ sugar in a shallow bowl or a sieve. Gently roll each cooled cookie in the confectioners’ sugar, ensuring it’s evenly coated on all sides. Alternatively, you can use a sieve to lightly dust the cookies while they are on the wire rack. This dusting not only adds to their beautiful snowball appearance but also contributes a delicate extra layer of sweetness and a lovely soft texture. Your Sweetened Condensed Milk Snowball Cookies are now ready to be enjoyed!
Conclusion:
There you have it! You’ve now mastered the art of creating delightful Sweetened Condensed Milk Snowball Cookies. These melt-in-your-mouth delights are surprisingly simple to make, proving that truly delicious treats don’t need to be complicated. Their tender texture and sweet, buttery flavor make them a perfect accompaniment to your favorite hot beverage, whether it’s a steaming cup of coffee, a soothing herbal tea, or a rich hot chocolate. They are also wonderfully versatile. For a festive twist, consider adding a touch of finely chopped candied gin extractger or a hint of almond extract to the dough. If you’re feeling adventurous, a light dusting of edible glitter after baking can elevate them for special occasions. Don’t be afraid to experiment and find your own perfect variation of these classic snowball cookies. We encourage you to share these cookies with loved ones and enjoy the joy they bring. Happy baking!
Frequently Asked Questions:
Can I make Sweetened Condensed Milk Snowball Cookies ahead of time?
Absolutely! These cookies actually improve in texture when made a day or two in advance. Store them in an airtight container at room temperature for up to 5 days.
What can I use if I don’t have sweetened condensed milk?
While sweetened condensed milk is key to the unique texture of these cookies, you can try substituting with evaporated milk combined with an equal amount of granulated sugar, although the texture might be slightly different. However, for the best results, we highly recommend using actual sweetened condensed milk.
Sweetened Condensed Milk Snowball Cookies
Easy and delicious snowball cookies made with sweetened condensed milk for a tender, melt-in-your-mouth texture, finished with a dusting of confectioners’ sugar.
Ingredients
-
1 cup softened butter
-
1 can (14 ounces) sweetened condensed milk
-
2 cups all-purpose flour
-
1 teaspoon baking powder
-
1 cup confectioners’ sugar (for dusting)
Instructions
-
Step 1
In a large mixing bowl, cream the softened butter until it’s light and fluffy. -
Step 2
Add the sweetened condensed milk to the creamed butter and mix until thoroughly combined, forming a smooth and creamy mixture. -
Step 3
In a separate bowl, whisk together the all-purpose flour and baking powder. Gradually add this dry mixture to the wet ingredients, mixing on low speed or folding gently until just combined. Do not overmix. -
Step 4
Preheat your oven to 325°F (160°C). Line baking sheets with parchment paper. Scoop or tablespoon portions of dough, roll into 1-inch balls, and place on the prepared baking sheets, leaving 2 inches between cookies. -
Step 5
Bake for 15-20 minutes, or until the edges are just beginning to turn a very pale golden color. The cookies should still look soft. -
Step 6
Let the cookies cool on the baking sheets for 5-10 minutes, then transfer to a wire rack to cool completely. -
Step 7
Once completely cool, gently roll each cookie in confectioners’ sugar to coat evenly.
Important Information
Nutrition Facts (Per Serving)
It is important to consider this information as approximate and not to use it as definitive health advice.
Allergy Information
Please check ingredients for potential allergens and consult a health professional if in doubt.