Chocolate Peanut Butter Rice Krispie Squares-Easy Recipe
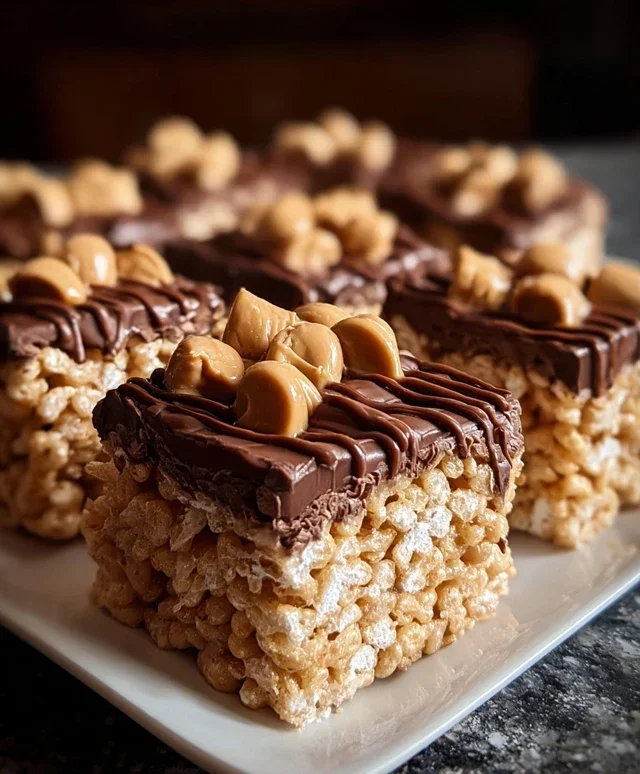
Chocolate Peanut Butter Rice Krispie Squares are more than just a treat; they’re a nostalgic trip back to childhood, a comforting hug in dessert form, and a guaranteed crowd-pleaser. Who can resist the irresistible pull of that chewy, crispy texture blended with the heavenly harmony of rich chocolate and salty peanut butter? It’s a flavor combination so iconic, it’s practically a love language. What truly makes these Chocolate Peanut Butter Rice Krispie Squares special is their effortless simplicity and their uncanny ability to bring pure joy to any occasion. Whether you’re looking for a quick afternoon pick-me-up, a fun activity to do with the kids, or a unique addition to your dessert table, these delightful squares always deliver. Get ready to discover your new favorite go-to recipe!
Ingredients:
Let’s get ready to create some seriously decadent Chocolate Peanut Butter Rice Krispie Squares! This recipe takes the beloved classic to a whole new level with the irresistible combination of gooey marshmallows, crunchy cereal, creamy peanut butter, and a rich chocolatey swirl. These are perfect for a quick dessert, a party treat, or just when you need a little something special. The best part? They’re incredibly easy to make and require no baking, which means more time to enjoy them!
Getting Started: Preparing Your Station
Before we dive into the melting and mixing, it’s crucial to have everything prepped and ready to go. This will make the process smooth and prevent your marshmallow mixture from setting before you can incorporate all the good stuff. First, grease a 9×13 inch baking pan generously with butter or non-stick cooking spray. You can also line it with parchment paper, leaving some overhang on the sides. This overhang will act as handles, making it super easy to lift the finished squares out of the pan once they’ve cooled. Next, measure out all your ingredients and have them within easy reach. This includes your Rice Krispie cereal in a large bowl, your peanut butter, butter, and marshmallows in a saucepan ready for melting, and your milk chocolate chips ready to be stirred in. Having everything measured and at the ready is a game-changer for quick recipes like this.
The Melting Magic
Now for the fun part – creating that glorious marshmallow base! In a large saucepan, combine the ¼ cup of unsalted butter and your marshmallows. If you’re using regular-sized marshmallows, 40 should do the trick. If you’re opting for the convenience of mini marshmallows, you’ll need about 1 ⅓ cups. Place the saucepan over low to medium-low heat. It’s important to melt these gently. You don’t want to scorch the marshmallows or the butter. Stir constantly with a rubber spatula or wooden spoon, coaxing the marshmallows into a smooth, gooey mass. Be patient; this process usually takes about 5-8 minutes. The goal is a completely melted, lump-free mixture. Once everything is melted and smooth, remove the saucepan from the heat.
Incorporating the Peanut Butter and Chocolate
With the marshmallow mixture off the heat, it’s time to add the star players: peanut butter and chocolate! Immediately stir in your ½ cup of peanut butter. Whether you prefer smooth and creamy or crunchy, either works beautifully here. Stir it in until it’s fully combined with the melted marshmallows, creating a beautifully swirled, rich peanut butter mixture. The heat from the marshmallows will help the peanut butter melt and incorporate seamlessly. Next, and this is where the chocolate magic happens, add your 1 cup of milk chocolate chips directly into the hot marshmallow and peanut butter mixture. Don’t stir them in just yet! Let them sit for a minute or two. The residual heat will start to melt the chocolate chips.
Now, using your spatula, gently stir the mixture until the chocolate chips are mostly melted and swirling through the peanut butter and marshmallow. You want a marbled effect, not a fully uniform chocolate mixture. This swirling creates pockets of intense chocolatey goodness that will set slightly as the squares cool.
Combining with Cereal and Pressing
Once your chocolate is beautifully marbled, it’s time to bring in the Rice Krispie cereal. Add your 6 cups of Rice Krispie cereal to the saucepan with the melted marshmallow, peanut butter, and chocolate mixture. Gently fold the cereal into the mixture, ensuring every piece is coated. Work quickly but carefully to avoid crushing the cereal too much. You want to maintain that signature crispiness.
Next, carefully spoon the mixture into your prepared 9×13 inch baking pan. This part can be a little sticky, so I highly recommend lightly greasing your hands or your spatula with butter or cooking spray. Press the mixture evenly into the pan. Use the back of your greased spatula or your greased hands to gently press down. The key here is to press firmly enough to make the squares hold together, but not so firmly that you compress them into a dense brick. A gentle, even press is all you need.
The Finishing Touches and Cooling
If you’re feeling extra fancy, this is the time to add your optional garnish. While the mixture is still warm and pliable, sprinkle chopped peanuts evenly over the top. This adds a delightful crunch and an extra layer of peanut flavor. Gently press the peanuts into the surface so they adhere.
Now comes the hardest part: the waiting! Let the Rice Krispie squares cool at room temperature for at least 1 hour, or until they are completely set. You can speed this up slightly by placing them in the refrigerator for about 30 minutes, but I find they hold their texture better when cooled at room temperature. Once cooled and firm, use the parchment paper overhang to lift the entire slab out of the pan. Place it on a cutting board and cut into squares using a sharp knife. For that classic look, I usually cut mine into about 24 squares.
Enjoy these incredible Chocolate Peanut Butter Rice Krispie Squares! They are best enjoyed at room temperature, and they store well in an airtight container for up to 3 days.
Conclusion:
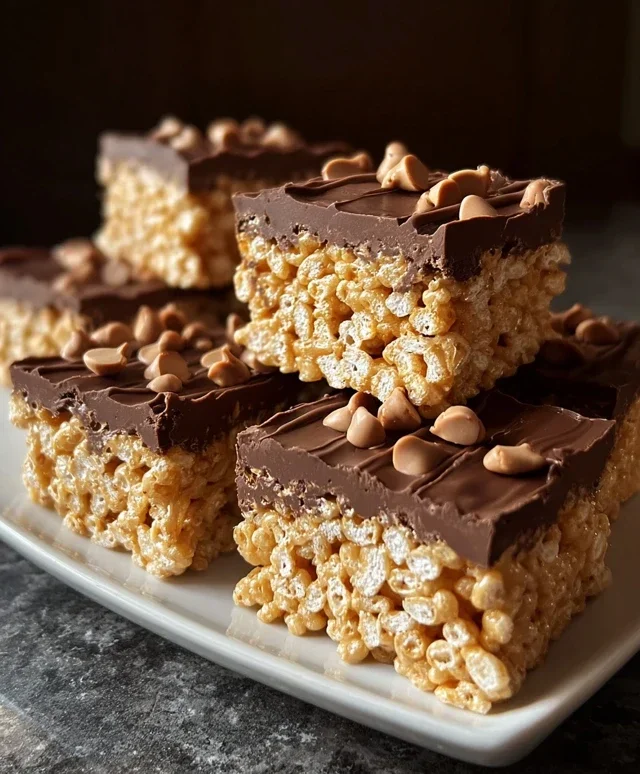
There you have it! These Chocolate Peanut Butter Rice Krispie Squares are an absolute triumph of simple indulgence. They’re incredibly easy to whip up, making them the perfect treat for last-minute cravings or for involving the whole family in some kitchen fun. The irresistible combination of chewy, crispy rice cereal, rich chocolate, and creamy peanut butter is a guaranteed crowd-pleaser, evoking childhood nostalgia with every bite. I love how adaptable they are; you can easily customize them to suit your taste preferences.
For serving, I find they’re best enjoyed at room temperature, where the peanut butter is soft and the chocolate is just begin extractning to melt. They make a fantastic dessert, a delightful afternoon snack, or even a sweet addition to a brunch spread. And don’t be afraid to experiment with variations! Adding a sprinkle of sea salt on top before the chocolate sets really elevates the flavors, or you could even stir in some mini chocolate chips or chopped peanuts for extra texture.
I genuinely encourage you to give these Chocolate Peanut Butter Rice Krispie Squares a try. They’re a testament to how a few simple ingredients can create something truly extraordinary. You won’t be disappointed with this delightful treat!
Frequently Asked Questions:
Can I make these squares ahead of time?
Absolutely! These Chocolate Peanut Butter Rice Krispie Squares are perfect for making ahead. Once they’ve cooled and set completely, store them in an airtight container at room temperature for up to 3-4 days. They actually taste even better after a day, as the flavors meld together.
What’s the best way to store leftovers?
To keep your squares fresh and delicious, store them in an airtight container at room temperature. Avoid refrigerating them if possible, as this can make them too hard and chewy. If you absolutely must refrigerate them due to extreme heat, let them come back to room temperature before serving for the best texture.
Can I use different types of chocolate?
Yes, you can! While milk chocolate is classic and delicious, feel free to experiment with dark chocolate for a richer flavor or semi-sweet chocolate for a less sweet option. You could even do a swirl of white chocolate for a decorative touch. Just make sure to melt it properly for a smooth coating.
Chocolate Peanut Butter Rice Krispie Squares
A delightful twist on classic Rice Krispie squares, featuring the irresistible combination of chocolate and peanut butter.
Ingredients
-
6 cups Rice Krispie cereal
-
½ cup peanut butter (smooth or crunchy)
-
¼ cup unsalted butter
-
40 regular size marshmallows or 1 ⅓ cups mini marshmallows
-
1 cup milk chocolate chips
-
Optional: chopped peanuts for garnish
Instructions
-
Step 1
Lightly grease a 9×13 inch baking pan. -
Step 2
In a large saucepan, melt the butter over low heat. Add the marshmallows and stir until completely melted. -
Step 3
Remove from heat and stir in the peanut butter until smooth and well combined. -
Step 4
Add the Rice Krispie cereal and stir gently until coated. -
Step 5
Press the mixture evenly into the prepared baking pan. -
Step 6
Melt the milk chocolate chips according to package directions. Drizzle over the pressed mixture. Sprinkle with chopped peanuts, if desired. -
Step 7
Let stand until the chocolate is set, then cut into squares.
Important Information
Nutrition Facts (Per Serving)
It is important to consider this information as approximate and not to use it as definitive health advice.
Allergy Information
Please check ingredients for potential allergens and consult a health professional if in doubt.