Cheesy Sourdough Cheddar Crackers-Easy Homemade Recipe
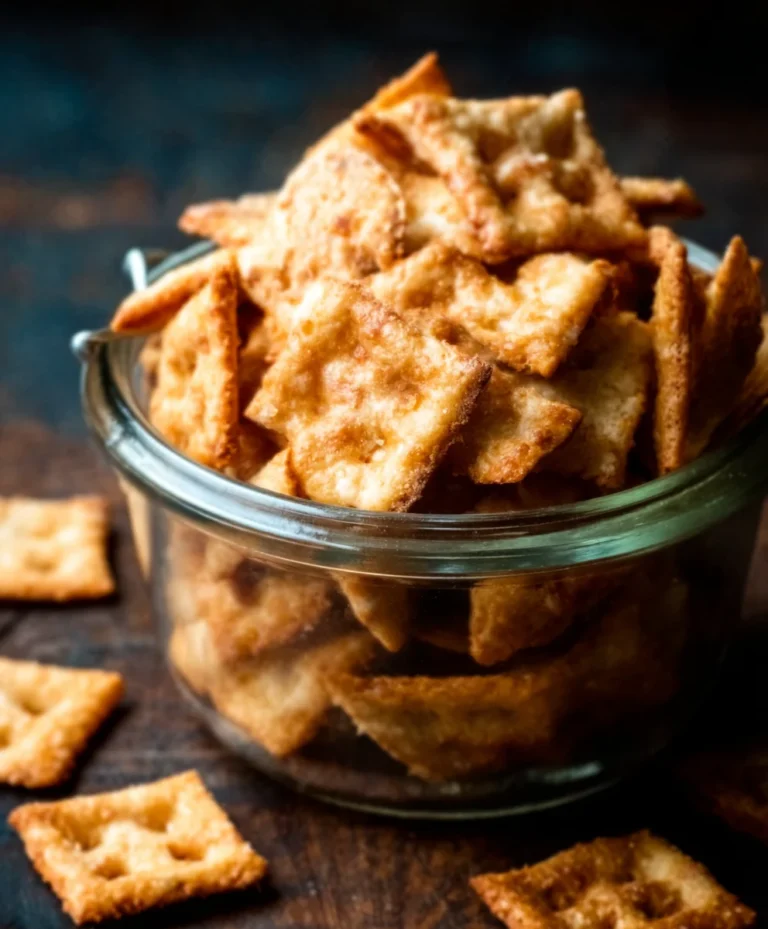
Sourdough Cheddar Crackers are more than just a snack; they’re a little bite of pure, savory joy. Imagin extracte a crisp, golden cracker, bursting with the sharp, tangy flavor of mature cheddar, all underpinned by that irresistible depth and subtle chegrape juicess that only a sourdough starter can provide. It’s no wonder these homemade wonders have captured the hearts (and taste buds!) of so many. Forget those bland, mass-produced versions. What makes these Sourdough Cheddar Crackers truly special is the alchemy of simple ingredients transformed by the magic of fermentation. The natural tang of the sourdough beautifully balances the richness of the cheese, creating a flavor profile that is both complex and incredibly addictive. They’re perfect for topping with a smear of cream cheese, dipping into your favorite soup, or simply devouring by the handful. Get ready to elevate your snacking game with these delightful Sourdough Cheddar Crackers!

Ingredients:
- 2 tablespoons butter, softened
- 1 cup all-purpose flour
- ¾ cup discard sourdough starter
- ¾ cup shredded sharp cheddar cheese
- Kosher salt, for sprinkling
Preparing the Dough
Step 1: Creaming the Butter and Starter
The first step in creating our delightful Sourdough Cheddar Crackers is to bring together the fat and the fermented flour base. In a medium-sized mixing bowl, add your softened butter. It’s important that the butter is truly softened, not melted. This means it should be pliable and easily indentable with a finger. If your butter is too cold, it will be difficult to incorporate smoothly, leading to uneven fat distribution in the dough. Next, add the ¾ cup of discard sourdough starter to the same bowl. This discard starter is the key to our crackers’ unique tangy flavor and slightly chewy texture. It should be at room temperature for optimal emulsification with the butter. Using a spatula or a wooden spoon, vigorously cream together the butter and the sourdough starter. You’re aiming for a cohesive, somewhat fluffy mixture. It might look a little lumpy at first, and that’s perfectly fine. Continue mixing until there are no large streaks of butter visible and the mixture is relatively uniform. This initial creaming process helps to create tiny pockets of air, which will contribute to the flakiness of the finished crackers. Take your time here; this is a foundational step for good texture.
Step 2: Incorporating Dry Ingredients
Once your butter and starter are well combined, it’s time to introduce the flour. Add the 1 cup of all-purpose flour directly into the bowl with the butter and starter mixture. At this stage, you might be tempted to use a mixer, but for crackers, gentle handling is usually best to avoid overdeveloping the gluten, which can result in tough crackers. Switch to a sturdy spatula or your hands for this step. Begin extract to gently fold the flour into the wet ingredients. The dough will initially look quite shaggy and dry. Continue to mix and fold until most of the dry flour has been incorporated. You’re not looking for a perfectly smooth dough at this point. The goal is to bring everything together into a cohesive mass. As you mix, you’ll notice the dough starting to come together. If it seems excessively dry and crum extractbly, you can add a tiny splash of water, no more than a teaspoon at a time, but be very cautious not to add too much, as this can make the dough sticky. The moisture content of your sourdough starter can vary, so it’s always best to err on the side of caution.
Step 3: Adding the Cheese and Forming the Dough Ball
Now for the star of the show – the cheese! Add the ¾ cup of shredded sharp cheddar cheese to the dough mixture. The sharpness of the cheddar will provide a wonderful depth of flavor that complements the tang of the sourdough beautifully. Gently fold the shredded cheese into the dough using your spatula or hands. Continue mixing until the cheese is evenly distributed throughout the dough. You’ll see little flecks of orange cheese scattered throughout the shaggy mixture. Once the cheese is incorporated, continue to gently knead the dough within the bowl for just a minute or two, or until it forms a single, relatively smooth ball. It will still be a little rustic, and that’s expected. Avoid over-kneading; we want tender crackers, not chewy ones. The dough should be firm enough to handle but still slightly pliable. If the dough feels too sticky, you can dust your hands with a little extra flour. The goal is to get it to hold together nicely.
Shaping and Baking the Crackers
Step 4: Chilling and Rolling the Dough
This step is crucial for achieving thin, crisp crackers. Once your cheese is incorporated and the dough has formed into a ball, wrap it tightly in plastic wrap. Then, flatten the ball slightly into a disc. Place the wrapped dough in the refrigerator for at least 30 minutes, and up to 2 days. Chilling the dough makes it much easier to roll out thinly without it sticking or tearing. A cold dough also helps the butter to firm up, which contributes to a flakier texture when baked. When you’re ready to bake, preheat your oven to 375°F (190°C) and line two large baking sheets with parchment paper. This prevents sticking and makes for easy cleanup. Remove the chilled dough from the refrigerator. Place the dough disc between two pieces of parchment paper. This method prevents sticking and allows for even rolling. Using a rolling pin, roll the dough out as thinly as possible. Aim for about 1/16 to 1/8 inch thick. The thinner you roll it, the crispier your crackers will be. Be patient and work your way outwards, rotating the dough occasionally to ensure an even thickness.
Step 5: Cutting and Seasoning for Baking
Once the dough is rolled out to your desired thinness, carefully peel off the top layer of parchment paper. If the dough has softened too much during rolling, pop it back in the fridge for 10-15 minutes. Now, it’s time to cut the dough into cracker shapes. You can use a pizza cutter, a sharp knife, or even cookie cutters for fun shapes. Create your desired cracker size and shape. After cutting, carefully transfer the parchment paper with the cut dough onto your prepared baking sheets, leaving a little space between each cracker. If any crackers have broken or seem uneven, you can gently press them back together. Now, for the finishing touch: generously sprinkle the tops of the crackers with kosher salt. The salt not only adds a delicious salty crunch but also enhances the savory cheddar flavor. You can also add a pinch of black pepper or a sprinkle of garlic powder at this stage if you like, but the simple salt topping is classic and highly effective.
Step 6: Baking and Cooling
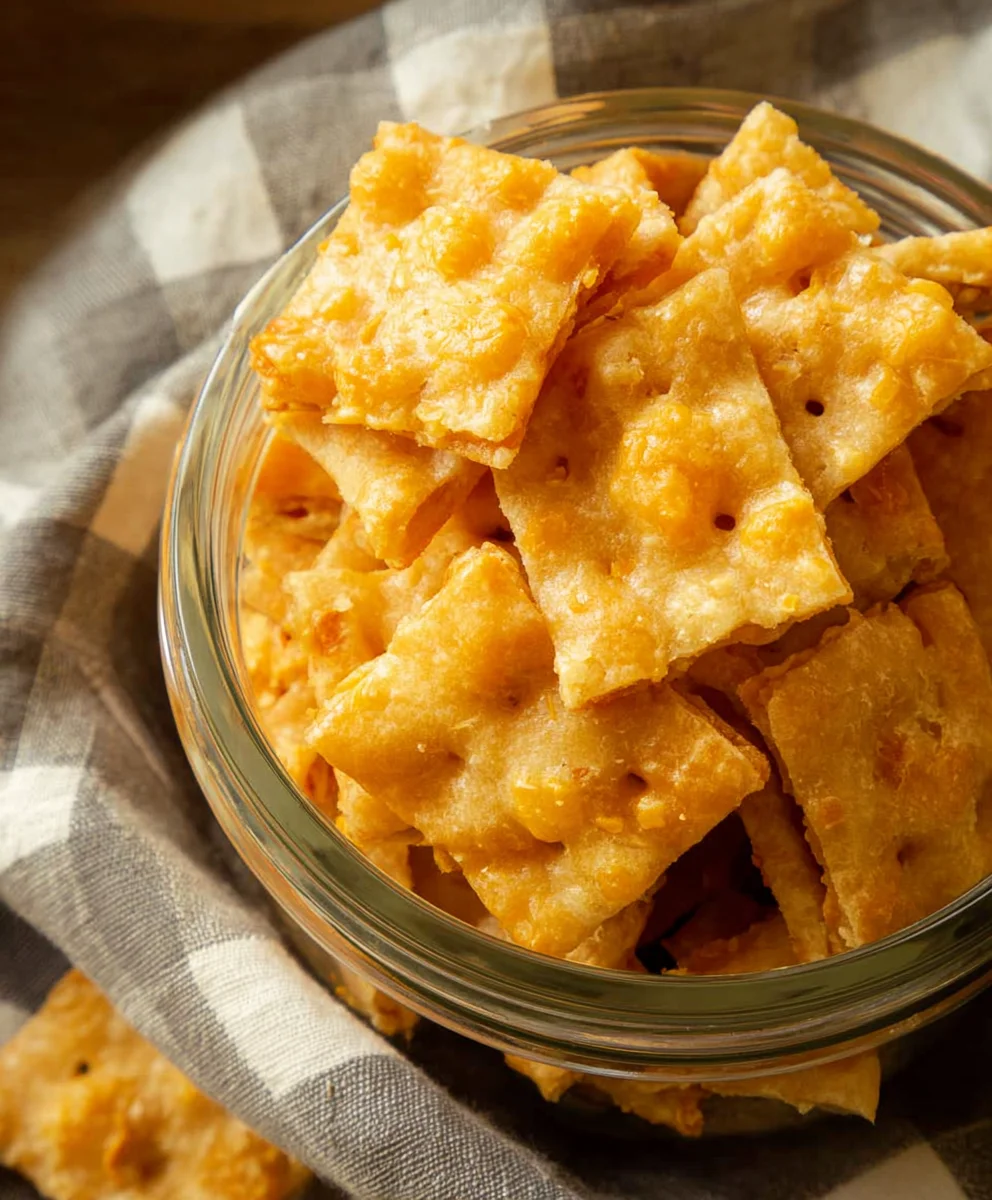
Place the baking sheets into your preheated oven. Bake for 12-18 minutes, or until the crackers are golden brown and crisp. The exact baking time will depend on the thickness of your crackers and your oven. Keep a close eye on them, especially towards the end of the baking time, as thin crackers can burn quickly. If you notice some crackers baking faster than others, you can carefully remove them from the baking sheet and continue baking the rest. Once baked to perfection, remove the baking sheets from the oven. Allow the crackers to cool completely on the baking sheets for a few minutes before carefully transferring them to a wire rack to cool completely. This cooling process is essential for achieving that perfect crispness. As they cool, they will firm up even more. Store your finished Sourdough Cheddar Crackers in an airtight container at room temperature. They are best enjoyed within a few days for optimal crunch.
Conclusion:
There you have it! These Sourdough Cheddar Crackers are a testament to how simple ingredients can transform into something truly special. The tangy depth of the sourdough starter, combined with the savory bite of sharp cheddar, creates a flavor profile that’s incredibly addictive. I hope you’ve enjoyed making them as much as I do. These crackers are perfect on their own for a satisfying snack, but they also shine when served alongside your favorite soups and salads, or as part of a cheese board. Don’t be afraid to get creative with variations – adding a pinch of smoked paprika, some finely chopped chives, or even a touch of garlic powder can elevate these even further. So go ahead, gather your ingredients, and experience the joy of homemade Sourdough Cheddar Crackers. You won’t regret it!
Frequently Asked Questions:
Can I use a different type of cheese for these Sourdough Cheddar Crackers?
Absolutely! While sharp cheddar provides a classic flavor, feel free to experiment. Gruyere, Monterey Jack, or even a spicy Pepper Jack can offer exciting twists. Just ensure the cheese grates well.
How should I store these Sourdough Cheddar Crackers?
Once completely cooled, store your Sourdough Cheddar Crackers in an airtight container at room temperature. They should stay fresh and crispy for up to a week.
Cheesy Sourdough Cheddar Crackers – Easy Homemade Recipe
Crispy, tangy, and cheesy homemade crackers made with discard sourdough starter and sharp cheddar cheese. A perfect snack or accompaniment.
Ingredients
-
2 tablespoons butter, softened
-
1 cup all-purpose flour
-
3/4 cup discard sourdough starter
-
3/4 cup shredded sharp cheddar cheese
-
Kosher salt, for sprinkling
Instructions
-
Step 1
In a medium bowl, cream together softened butter and discard sourdough starter until cohesive and slightly fluffy. -
Step 2
Gently fold in the all-purpose flour until most of the dry ingredients are incorporated, creating a shaggy dough. Add a tiny splash of water if too dry. -
Step 3
Add the shredded sharp cheddar cheese and gently fold until evenly distributed. Knead lightly until the dough forms a single, relatively smooth ball. -
Step 4
Wrap the dough tightly in plastic wrap, flatten into a disc, and chill in the refrigerator for at least 30 minutes. Preheat oven to 375°F (190°C) and line two baking sheets with parchment paper. -
Step 5
Place the chilled dough between two pieces of parchment paper and roll out as thinly as possible (1/16 to 1/8 inch thick). -
Step 6
Cut the dough into desired cracker shapes using a pizza cutter or knife. Transfer to the prepared baking sheets. Sprinkle generously with kosher salt. -
Step 7
Bake for 12-18 minutes, or until golden brown and crisp. Allow to cool completely on the baking sheets before transferring to a wire rack.
Important Information
Nutrition Facts (Per Serving)
It is important to consider this information as approximate and not to use it as definitive health advice.
Allergy Information
Please check ingredients for potential allergens and consult a health professional if in doubt.