Cheesecake Fruit Salad Roll Ups Easy Dessert
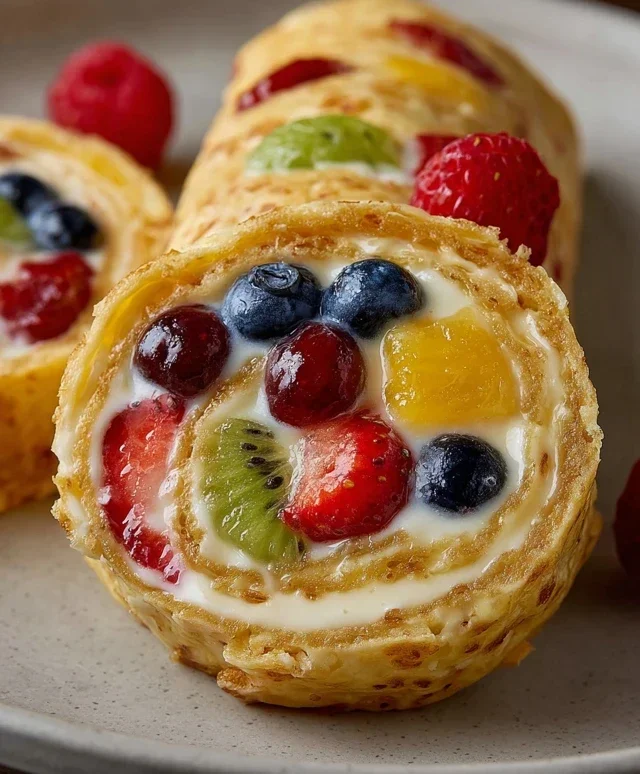
Cheesecake Fruit Salad Roll Ups are the dessert innovation you’ve been dreaming of! Imagin extracte all the creamy, dreamy indulgence of cheesecake fused with the vibrant freshness of a fruit salad, all wrapped up into a delightful, handheld treat. It’s the perfect answer to those moments when you crave something sweet but also want to feel a little virtuous. We all love cheesecake for its luxurious texture and comforting richness, and who can resist a colourful medley of juicy fruits? These roll ups take the best of both worlds and combine them in a way that’s utterly irresistible. What truly makes Cheesecake Fruit Salad Roll Ups so special is their playful presentation and the explosion of flavours in every bite. They’re surprisingly easy to make, yet they look so sophisticated, making them ideal for parties, picnics, or simply a special weeknight treat that will have everyone asking for the recipe.
Cheesecake Fruit Salad Roll Ups
Get ready to delight your taste buds with these incredible Cheesecake Fruit Salad Roll Ups! They’re a fun, fresh, and utterly delicious way to enjoy the vibrant flavors of summer fruits combined with the creamy indulgence of cheesecake. These are perfect for a light dessert, a special brunch, or even a playful snack that everyone will love. The beauty of these roll-ups lies in their simplicity and the delightful contrast between the slightly crisp tortilla and the luscious, fruity filling. Let’s get started!
Ingredients:
Preparing the Creamy Cheesecake Filling
This is where the magic begin extracts! We’ll start by creating a dreamy, creamy base that’s reminiscent of classic cheesecake, but much lighter and perfect for our roll-ups.
1. In a medium mixing bowl, combine the softened cream cheese and ½ cup of the room temperature unsalted butter. Beat these together with an electric mixer on medium speed until they are wonderfully smooth and well-combined. There should be no lumps of cream cheese remaining. This is crucial for a silky texture. If your cream cheese isn’t quite at room temperature, you can gently warm it for a few seconds in the microwave, but be careful not to melt it.
2. Gradually add the 1 ½ cups of powdered sugar to the cream cheese and butter mixture, one-half cup at a time, beating well after each addition. Scrape down the sides of the bowl occasionally to ensure everything is incorporated. Continue to beat until the mixture is light, fluffy, and completely smooth. This forms our cheesecake base.
3. Next, stir in the 1 teaspoon of vanilla extract. This adds that classic comforting flavor that pairs so beautifully with fruit and cream.
4. Now, it’s time to fold in the whipped cream. If you’re using pre-made whipped cream, gently fold it in until just combined. If you’re making your own, whip the ½ cup + 2 Tbsp chilled heavy cream with 2.5 Tbsp powdered sugar until stiff peaks form, then carefully fold this into the cream cheese mixture. Be gentle so you don’t deflate the whipped cream, as this will keep our filling airy and light.
5. Finally, prepare the sugar-free vanilla instant pudding according to the package directions, but use slightly less liquid than called for, or even just water, as we want it to be a thicker consistency to help bind our fruit. Once prepared and slightly thickened, gently fold the pudding into the cream cheese mixture. This step adds stability and a delightful vanilla essence to our filling, making it richer and more decadent. Set this creamy mixture aside.
Assembling the Fruit Salad
While our cheesecake filling is chilling slightly, let’s get our fresh fruits ready.
1. In a separate bowl, gently combine the 2/3 cup fresh blueberries, 2/3 cup small diced fresh strawberries, 3 small diced peaches (make sure they’re peeled!), 2 small diced kiwis, and the ½ cup fresh raspberries, which we’ve sliced in half. Toss them gently to distribute the colors and flavors evenly. The variety of colors and textures from these fruits will make our roll-ups visually appealing and incredibly delicious. Try to dice the fruits into relatively uniform, small pieces so they distribute nicely within the roll-up and are easy to bite into.
Constructing the Roll Ups
Now for the fun part – bringin extractg it all together!
1. Lay one of the large tortillas flat on a clean surface. Spread a generous layer of the prepared cheesecake filling evenly over the surface of the tortilla, leaving about a ½-inch border around the edges. You want a good amount of filling, but not so much that it will ooze out excessively when rolled.
2. Spoon a portion of the prepared fruit salad mixture over the cheesecake filling, concentrating it a little more towards one edge of the tortilla to help with rolling. Don’t overload the tortilla with fruit, as this can make it difficult to roll and can cause it to break.
3. Carefully and tightly roll up the tortilla, starting from the edge where you placed the fruit. Tuck in the sides as you roll to create a neat package. The slight stickiness of the cheesecake filling and the tortilla will help it hold its shape. Repeat this process with the remaining tortillas and filling.
Creating the Cinnamon Sugar Crisp
This final touch adds a delightful crunch and a hint of warmth that perfectly complements the cool, creamy filling and fresh fruit.
1. In a small shallow dish, combine the ½ cup sugar and 1 teaspoon cinnamon. Stir well until the cinnamon is evenly distributed throughout the sugar.
2. Brush the outside of each rolled-up tortilla with the 2–3 tablespoons of melted unsalted butter.
3. Gently roll the buttered tortillas in the cinnamon-sugar mixture, ensuring they are coated evenly. This step is key to achieving that irresistible sweet and cinnamon-kissed crispiness.
4. Heat a non-stick skillet over medium heat. Place the coated roll-ups seam-side down in the skillet and cook for 1-2 minutes per side, or until golden brown and slightly crisp. You may need to do this in batches. Keep an eye on them as they can brown quickly.
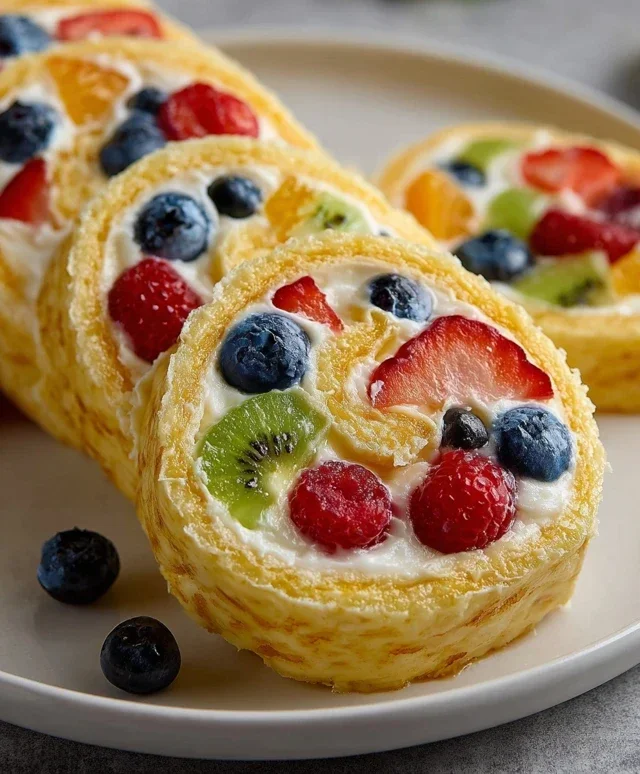
5. Once cooked, remove the roll-ups from the skillet and let them cool slightly on a wire rack. You can then slice them into individual portions, like pinwheels, or serve them whole. These are best enjoyed shortly after making them to experience the contrast between the warm, crisp exterior and the cool, creamy filling. Enjoy every bite of this delightful treat!
Conclusion:
There you have it – a delightful and surprisingly simple recipe for Cheesecake Fruit Salad Roll Ups! This recipe truly shines because it’s a fantastic way to combine the creamy indulgence of cheesecake with the refreshing sweetness of fresh fruit, all wrapped up in a convenient and visually appealing format. It’s perfect for a light dessert, a fun brunch item, or even a special snack that everyone will love. The beauty of these roll ups lies in their versatility; you can tailor them to your favorite fruits or dietary preferences.
For serving suggestions, I love presenting these roll ups on a colorful platter, perhaps with a dusting of powdered sugar or a dollop of extra whipped cream. They are also wonderful served alongside a cup of tea or coffee. Don’t be afraid to get creative with variations! Consider adding a sprinkle of chopped nuts for crunch, a drizzle of chocolate sauce, or even using different types of fruit like mango, kiwi, or berries. The possibilities are endless! I genuinely encourage you to give these Cheesecake Fruit Salad Roll Ups a try; they are sure to become a family favorite. They offer a unique twist on familiar flavors and are guaranteed to impress!
Frequently Asked Questions:
Can I make these ahead of time?
Yes, you can prepare the cream cheese mixture and chop the fruit ahead of time. However, for the best texture and to prevent the tortillas from getting soggy, I recommend assembling the roll ups closer to serving time, ideally within a few hours.
What kind of tortillas work best?
Flour tortillas, particularly smaller sizes like fajita or taco size, tend to work very well. They are pliable and hold their shape nicely once rolled. You can also experiment with whole wheat or even gluten-free tortillas if needed.
What if my fruit is too watery?
If you’re using very juicy fruits like watermelon or cantaloupe, it’s a good idea to drain them well or even pat them dry with a paper towel before adding them to the cream cheese mixture. This will help prevent the roll ups from becoming too wet and maintain their integrity.
Cheesecake Fruit Salad Roll Ups
A delightful and easy dessert featuring a creamy cheesecake filling and fresh fruit wrapped in a warm tortilla, dusted with cinnamon sugar.
Ingredients
-
½ cup unsalted butter, room temperature
-
1 ½ cups powdered sugar
-
6 oz cream cheese, room temperature
-
1 teaspoon vanilla extract
-
1 ¼ cups whipped cream
-
2/3 cup fresh blueberries
-
2/3 cup small diced fresh strawberries
-
3 small peaches, peeled and diced
-
2 kiwis, peeled and small diced
-
½ cup fresh raspberries, sliced in half
-
2 (1 oz) boxes sugar-free vanilla instant pudding
-
4–5 large tortillas, room temperature
-
2–3 tablespoons unsalted butter, melted
-
½ cup sugar
-
1 teaspoon cinnamon
Instructions
-
Step 1
In a large bowl, beat together the softened butter and powdered sugar until smooth. Add the cream cheese and vanilla extract, beating until well combined and creamy. -
Step 2
Gently fold in the whipped cream and the contents of the two sugar-free vanilla instant pudding boxes. Mix until just combined, ensuring no dry pockets remain. -
Step 3
In a separate bowl, combine the blueberries, strawberries, diced peaches, diced kiwis, and halved raspberries. Toss gently. -
Step 4
Lay out one large tortilla. Spread a generous layer of the cheesecake mixture onto the tortilla, leaving a small border. Spoon a portion of the fruit salad mixture over the cheesecake layer. -
Step 5
Tightly roll up the tortilla, tucking in the sides as you go to create a compact roll-up. -
Step 6
Repeat with the remaining tortillas, cheesecake mixture, and fruit salad. Cut each roll-up in half if desired. -
Step 7
In a small bowl, whisk together the melted butter, sugar, and cinnamon. Brush the outside of each roll-up lightly with the butter-sugar mixture.
Important Information
Nutrition Facts (Per Serving)
It is important to consider this information as approximate and not to use it as definitive health advice.
Allergy Information
Please check ingredients for potential allergens and consult a health professional if in doubt.