Easy St. Patrick’s Day Cookies-Simple Festive Treats
Easy St. Patrick’s Day Cookies are the perfect way to bring a little bit of festive cheer into your kitchen without any fuss. As March rolls around and the promise of spring fills the air, there’s something undeniably delightful about decorating and, of course, devouring these sweet treats. People absolutely adore them because they’re wonderfully customizable and always a crowd-pleaser, whether you’re hosting a party or just looking for a fun activity to do with family. What makes these Easy St. Patrick’s Day Cookies truly special is their simplicity. You don’t need to be a master baker to achieve beautifully decorated, delicious cookies. They’re designed to be approachable, fun, and most importantly, incredibly tasty, making them an instant hit for any St. Paddy’s Day celebration.
Why You’ll Love These Cookies
Simple Ingredients, Big Flavor
We’ve kept the ingredients list short and sweet, focusing on pantry staples you likely already have on hand. No need for fancy techniques or obscure items – just pure, unadulterated cookie joy. These Easy St. Patrick’s Day Cookies are proof that you can create something magical with minimal effort.
Making Your St. Patrick’s Day Shine
A Touch of Green Magic
The festive green icing and sprinkles are the stars of the show, instantly transforming simple sugar cookies into vibrant symbols of the holiday. They’re perfect for sharing, gifting, or simply enjoying with a warm cup of tea on a cozy afternoon. Get ready to spread some green cheer!
Easy St. Patrick’s Day Cookies
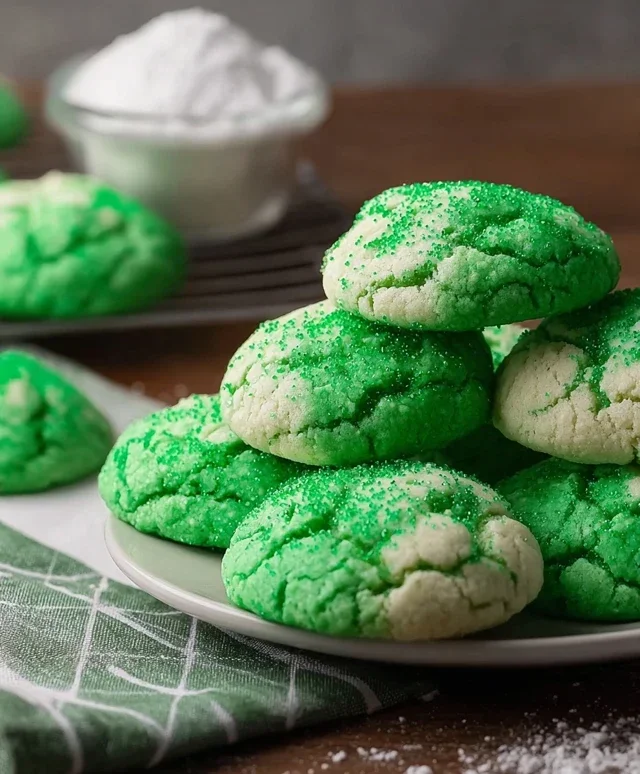
Looking for a simple yet festive way to celebrate St. Patrick’s Day? These Easy St. Patrick’s Day Cookies are the perfect solution! Made with a surprisingly simple base of white cake mix, these cookies come together quickly and are wonderfully customizable. The vibrant green color screams St. Paddy’s Day, and the sweet, soft texture is sure to be a hit with everyone from the little leprechauns in your life to the grown-ups looking for a touch of holiday cheer. Forget complicated doughs and chilling times; these cookies are designed for maximum flavor and fun with minimal fuss. Whether you’re hosting a party, looking for a classroom treat, or just want to add a little green to your day, this recipe is your go-to. Let’s get baking and bring some luck to your kitchen!
Ingredients:
Gathering Your Green Goodies:
Before we dive into the fun, let’s make sure we have all our ingredients ready. The beauty of this recipe lies in its simplicity, and using a white cake mix as the base is a fantastic shortcut. It provides a tender crum extractb and a neutral flavor that’s perfect for our St. Patrick’s Day twist. Make sure your cake mix is at room temperature, just like your eggs. This helps everything emulsify smoothly, leading to a better cookie texture. The vegetable oil contributes to the softness and moisture of the cookies, ensuring they aren’t dry or crum extractbly. And of course, the Kelly green gel food coloring is the star of our St. Patrick’s Day show! Gel food coloring is preferred because it’s more concentrated than liquid, meaning you can achieve a more vibrant color without adding extra moisture that could alter the cookie dough’s consistency. Don’t be tempted to add too much, though; a little goes a long way! The granulated sugar will be mixed into the dough for a hint of sweetness, while the powdered sugar will be used for a simple, sweet glaze that adds a final touch of festive flair.
Making the Lucky Dough:
Now for the fun part – creating our vibrant green cookie dough!
1. In a large mixing bowl, begin extract by combining the white cake mix, the two large eggs, and the 1/3 cup of vegetable oil. Use your electric mixer on low speed to initially incorporate these ingredients. You’ll notice the mixture will start to form a crum extractbly dough. Gradually increase the mixer speed to medium and continue to beat for about 2-3 minutes, or until the dough becomes smooth and cohesive. It will have a slightly sticky, yet manageable consistency. This initial mixing is crucial for developing the structure of our cookies.
2. Now it’s time to add that signature St. Patrick’s Day color! Add the 1/4 teaspoon of Kelly green gel food coloring to the dough. If you desire an even more intense green, you can add another tiny drop, but be cautious not to overdo it. Continue to mix on medium speed until the color is evenly distributed throughout the dough. You want a consistent, cheerful green. Scrape down the sides of the bowl with a spatula a few times during this process to ensure all the cake mix and food coloring are fully incorporated. The dough should now be a beautiful, festive green color.
3. Once your dough is beautifully green and well combined, it’s time to prepare for baking. Preheat your oven to 350°F (175°C). Line your baking sheets with parchment paper. This is a simple step that makes clean-up a breeze and prevents your cookies from sticking to the pan, ensuring they slide off perfectly once cooled.
4. Using a cookie scoop or two spoons, drop rounded tablespoons of the green cookie dough onto the prepared baking sheets. Leave about 2 inches of space between each cookie, as they will spread slightly while baking. For perfectly uniform cookies, a cookie scoop is your best friend. If you don’t have one, just do your best to make them all roughly the same size so they bake evenly. Gently flatten the tops of the dough balls with the bottom of a glass or your fingertips if you prefer a flatter cookie. This also helps them bake more evenly.
5. Bake the cookies for 9-12 minutes, or until the edges are lightly golden and the centers are set. The exact baking time will depend on your oven and the size of your cookies. It’s better to underbake slightly than overbake for that wonderfully soft cookie texture. Keep a close eye on them during the last few minutes. They should look slightly underdone in the center when you pull them out, as they will continue to cook as they cool on the baking sheet. Let the cookies cool on the baking sheets for 5 minutes before transferring them to a wire rack to cool completely. This resting period on the hot baking sheet allows the cookies to firm up, making them easier to move without breaking.
The Sweet Green Glaze:
While your cookies are cooling, let’s whip up a simple, delightful glaze.
1. In a small bowl, whisk together the 3 tablespoons of granulated sugar and the 6 tablespoons of powdered sugar. Gradually add a tablespoon of milk or water at a time, whisking until you achieve a smooth, pourable consistency. You want it thick enough to coat the cookie but thin enough to drizzle easily. If it’s too thick, add a tiny bit more liquid; if it’s too thin, add a little more powdered sugar. You can also add a touch more green food coloring to the glaze if you want an even more vibrant finish, or keep it white for a nice contrast.
2. Once the cookies are completely cool, you can either dip the tops of the cookies into the glaze, or use a spoon to drizzle the glaze over the tops. You can also use a piping bag with a small tip for more intricate designs, but a simple drizzle is just as festive and even easier! For an extra touch of St. Patrick’s Day magic, you could sprinkle a few edible green sprinkles over the wet glaze before it sets. Let the glaze set completely before storing the cookies in an airtight container.
Enjoy these delightful and easy St. Patrick’s Day Cookies! They’re a simple way to spread some holiday cheer and a delicious treat for everyone to enjoy.
Conclusion:
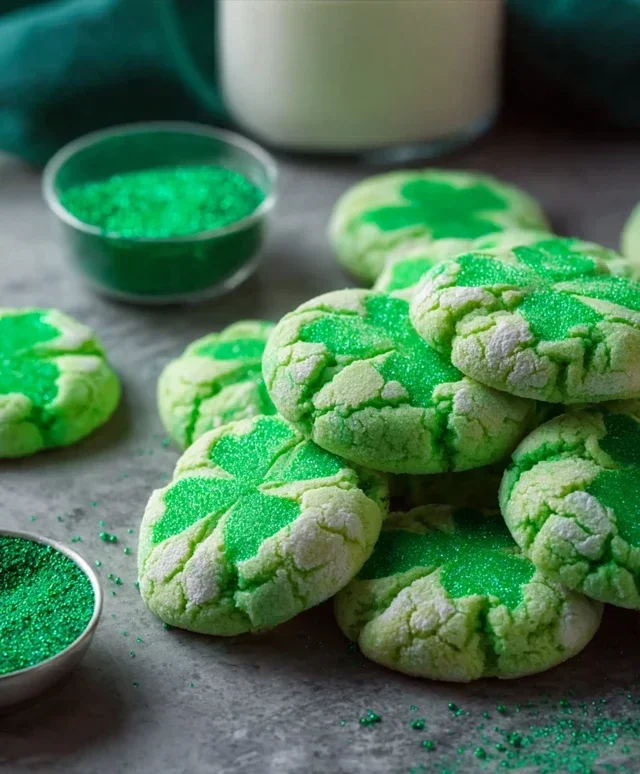
These Easy St. Patrick’s Day Cookies truly are a winner for celebrating the festive holiday! Their simplicity makes them perfect for bakers of all levels, and the delightful green hue instantly brings a touch of Irish cheer to any gathering. You’ll love how quickly they come together, leaving you more time to enjoy the festivities. For serving, consider arrangin extractg them on a festive platter alongside a glass of milk or a cup of warm tea. They also make fantastic edible gifts for friends and family, tied with a green ribbon!
Looking for ways to switch things up? You can easily adapt this recipe to create different St. Patrick’s Day treats. Try adding a touch of peppermint extract for a minty twist, or sprinkle them with edible gold coins before baking for extra sparkle. Don’t be afraid to experiment with different cookie cutters – sbeef hamrocks, pots of gold, and even leprechauns are all fun shapes to try. The key is to have fun with it and make these Easy St. Patrick’s Day Cookies your own!
Frequently Asked Questions:
Can I make these cookies ahead of time?
Absolutely! These cookies store beautifully in an airtight container at room temperature for up to 3-4 days. This makes them perfect for prepping a day or two in advance, reducing stress on St. Patrick’s Day itself.
What kind of food coloring should I use?
Gel food coloring generally provides the most vibrant and concentrated color for baking. Start with a small amount and gradually add more until you achieve your desired shade of green. Liquid food coloring can sometimes alter the texture slightly.
Are there any nut-free options?
Yes, this recipe is naturally nut-free as written. If you choose to add any sprinkles or decorations, just be sure to check the labels to ensure they are also nut-free to accommodate any dietary needs.
Easy St. Patrick’s Day Cookies
Simple and festive green cookies perfect for St. Patrick’s Day celebrations.
Ingredients
-
1 box (15.25 oz) white cake mix (about 3 cups)
-
2 large eggs
-
1/3 cup vegetable oil
-
1/4 teaspoon Kelly green gel food coloring
-
3 tablespoons granulated sugar
-
6 tablespoons powdered sugar
Instructions
-
Step 1
Preheat oven to 350°F (175°C). Line baking sheets with parchment paper. -
Step 2
In a large bowl, combine the white cake mix, eggs, and vegetable oil. Mix until well combined and a dough forms. -
Step 3
Add the Kelly green gel food coloring and mix until the dough is evenly colored green. -
Step 4
Roll dough into 1-inch balls and place them on the prepared baking sheets, about 2 inches apart. -
Step 5
In a small bowl, combine the granulated sugar and powdered sugar. Roll each cookie ball in the sugar mixture until coated. -
Step 6
Bake for 8-10 minutes, or until the edges are lightly golden and the centers are set. -
Step 7
Let the cookies cool on the baking sheets for a few minutes before transferring them to a wire rack to cool completely.
Important Information
Nutrition Facts (Per Serving)
It is important to consider this information as approximate and not to use it as definitive health advice.
Allergy Information
Please check ingredients for potential allergens and consult a health professional if in doubt.